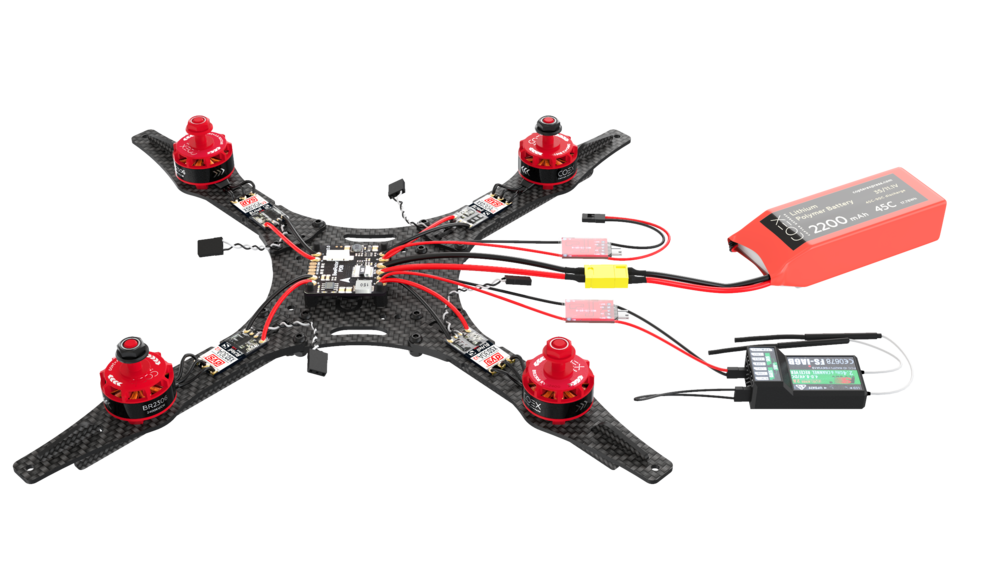
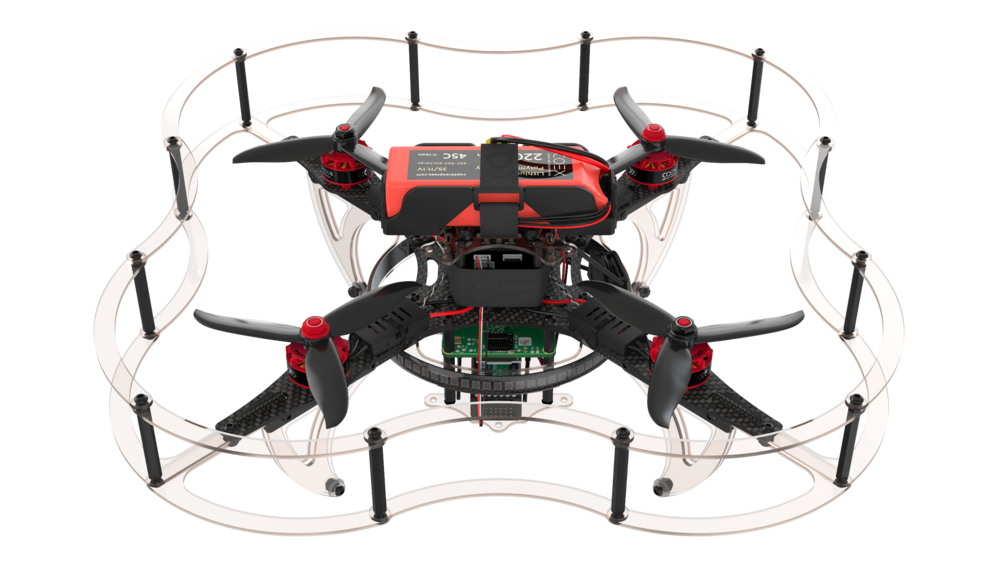
# Clover 4 assembly
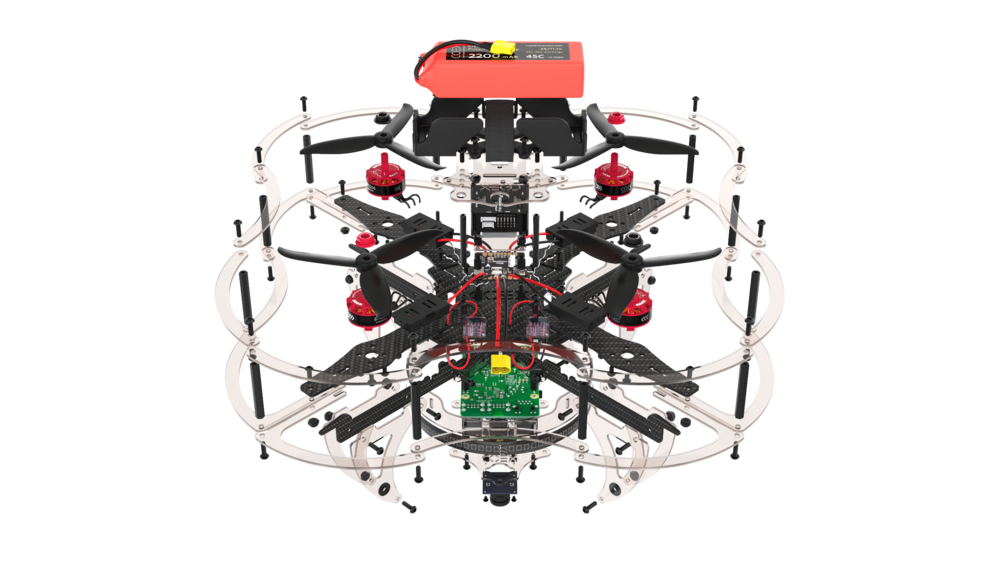 ## Frame base assembly
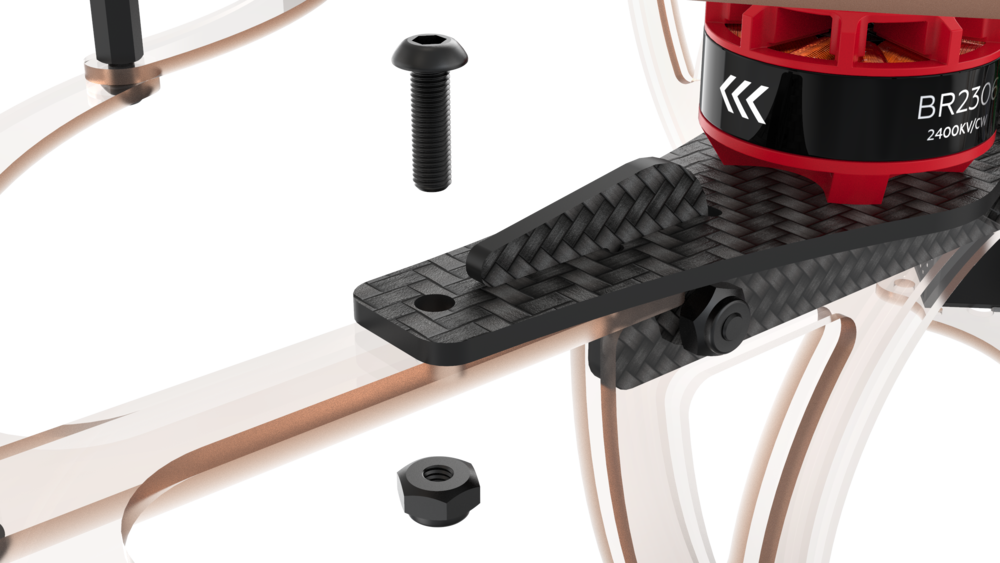
> **Info** To increase the strength of the frame, you can print on a 3D printer or cut on a laser cutter reinforcing pads.
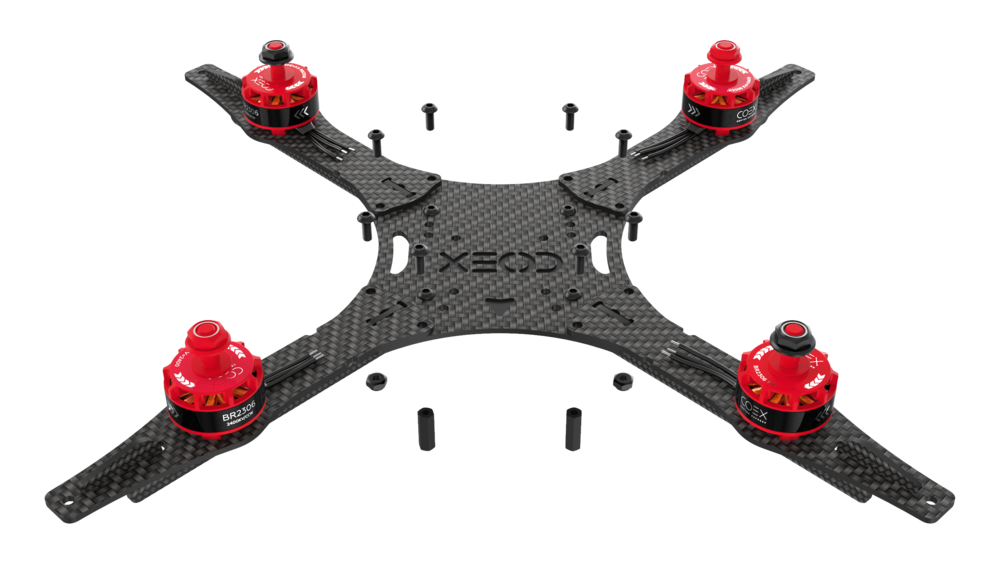
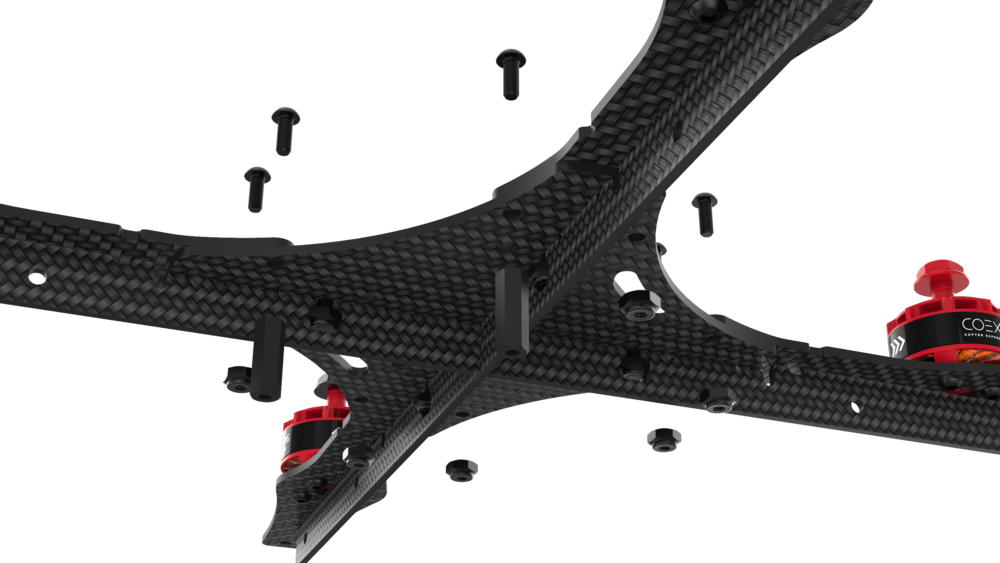
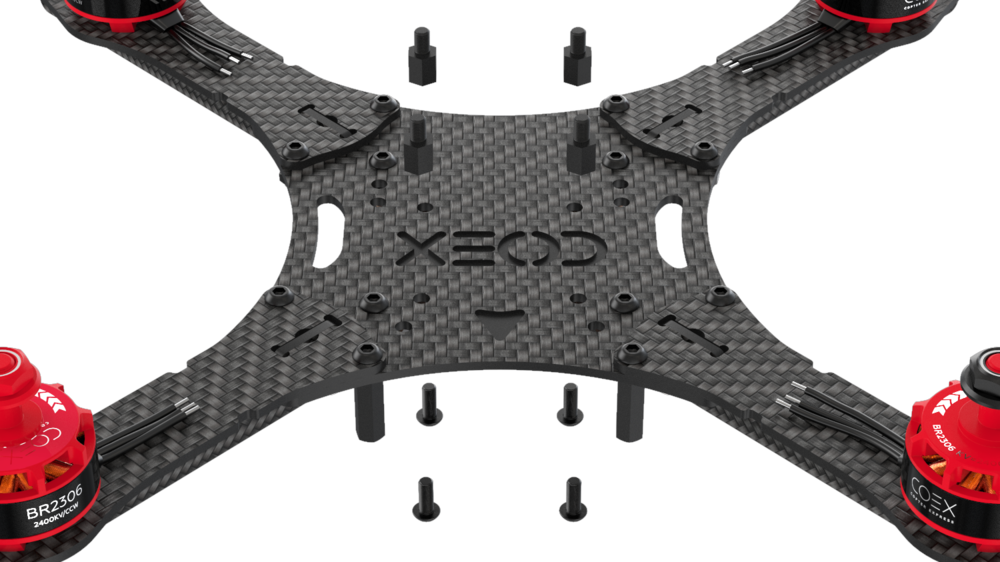
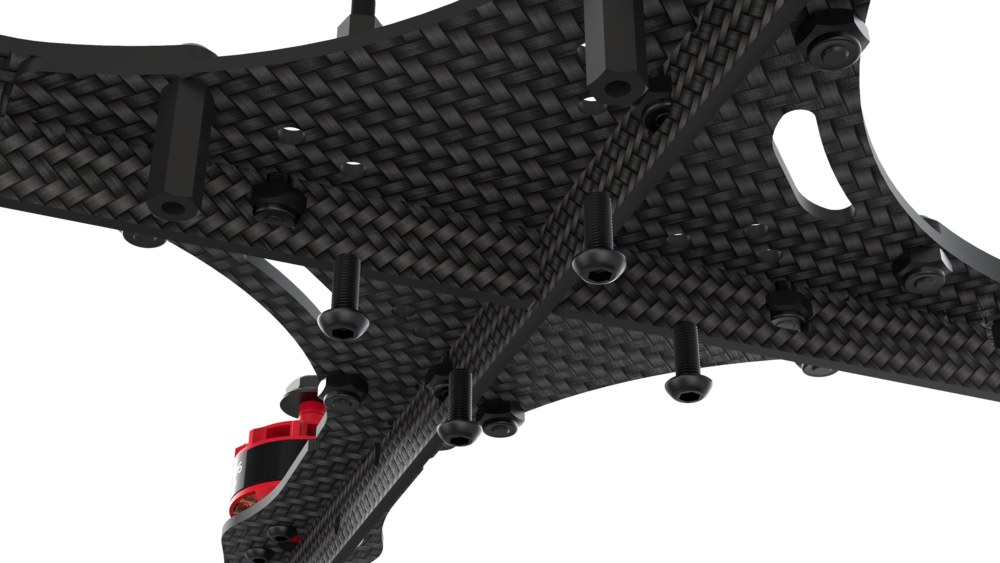
1. Mount the reinforcement pads on the stiffening ribs if you have them. Proceed without them if you don't.
## Frame base assembly
> **Info** To increase the strength of the frame, you can print on a 3D printer or cut on a laser cutter reinforcing pads.
1. Mount the reinforcement pads on the stiffening ribs if you have them. Proceed without them if you don't.
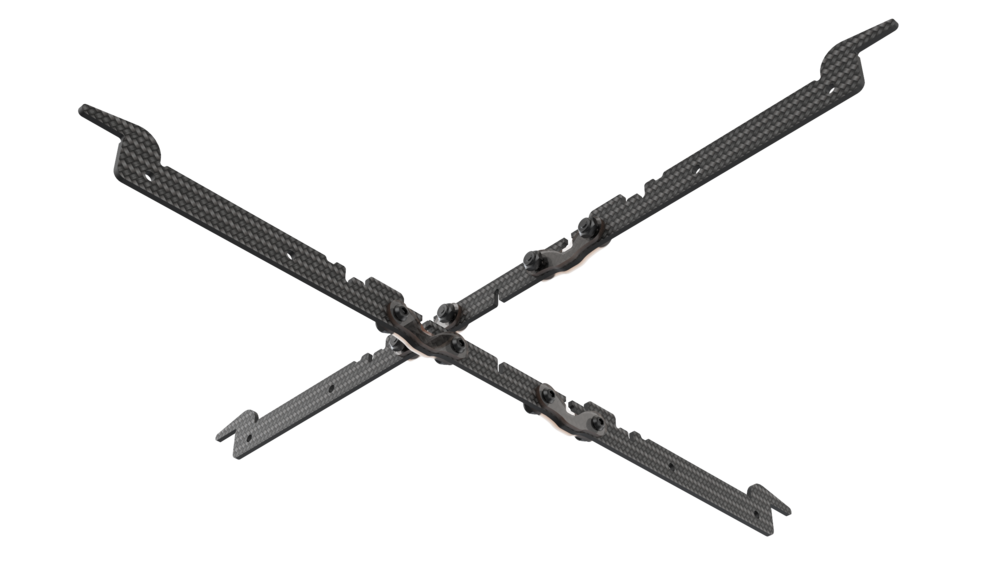
 2. Align two carbon stiffening ribs using the center notch.
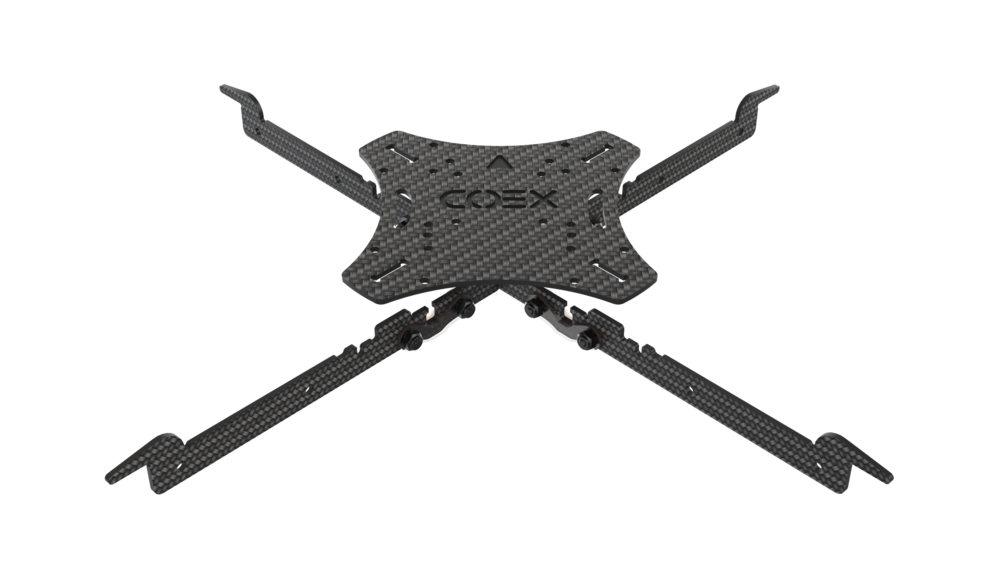
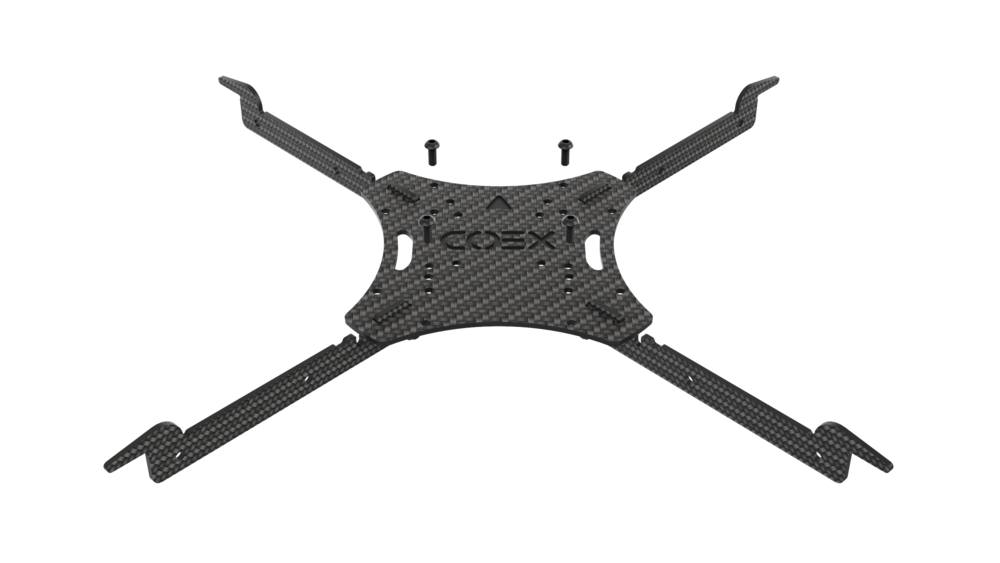
3. Install the top carbon deck using notches as guides.
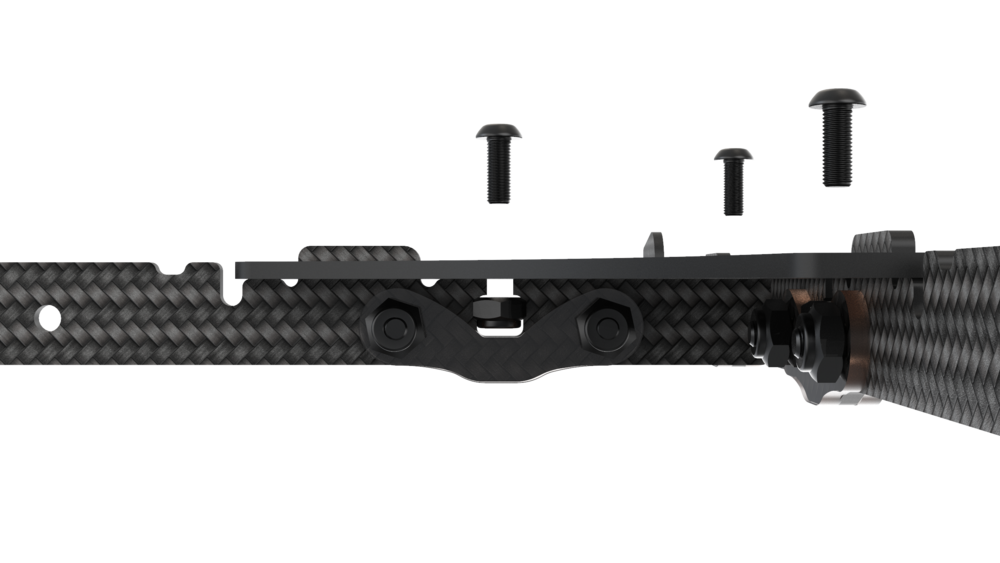
4. Place self-locking steel nuts into the slots in reinforcement plates and tighten the assembly with M3x8 screws.
## Installing motors
1. Unbox the motors.
2. Shorten the motor wires using wire strippers or side cutters:
* Cut wires to 30 mm.
* Strip 5 mm of insulation while taking care to not damage the cores
2. Align two carbon stiffening ribs using the center notch.
3. Install the top carbon deck using notches as guides.
4. Place self-locking steel nuts into the slots in reinforcement plates and tighten the assembly with M3x8 screws.
## Installing motors
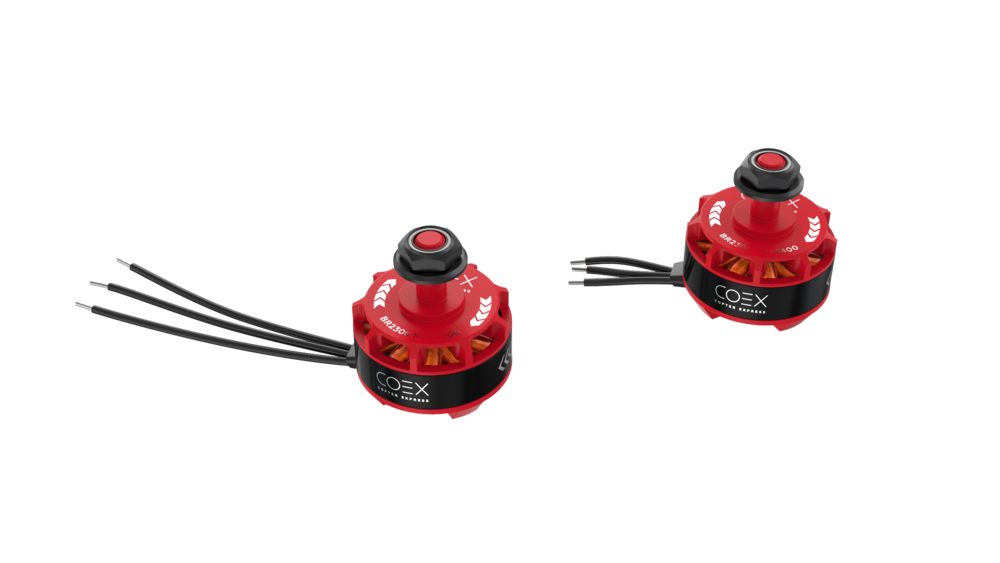
1. Unbox the motors.
2. Shorten the motor wires using wire strippers or side cutters:
* Cut wires to 30 mm.
* Strip 5 mm of insulation while taking care to not damage the cores
 * Twist the cores.
* [Tin the wires](tinning.md). You may want to use tweezers to hold the wire.
3. Place the motor on the support arm.
4. Use hexagonal M3x5 screws to attach the motor to its arm.
* Twist the cores.
* [Tin the wires](tinning.md). You may want to use tweezers to hold the wire.
3. Place the motor on the support arm.
4. Use hexagonal M3x5 screws to attach the motor to its arm.
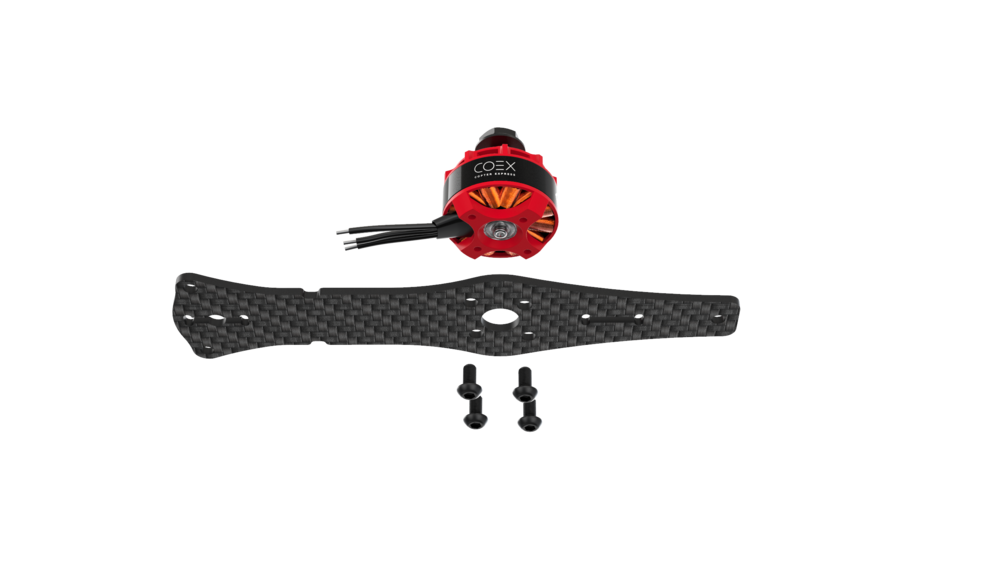 Perform these actions for each motor.
## Frame assembly
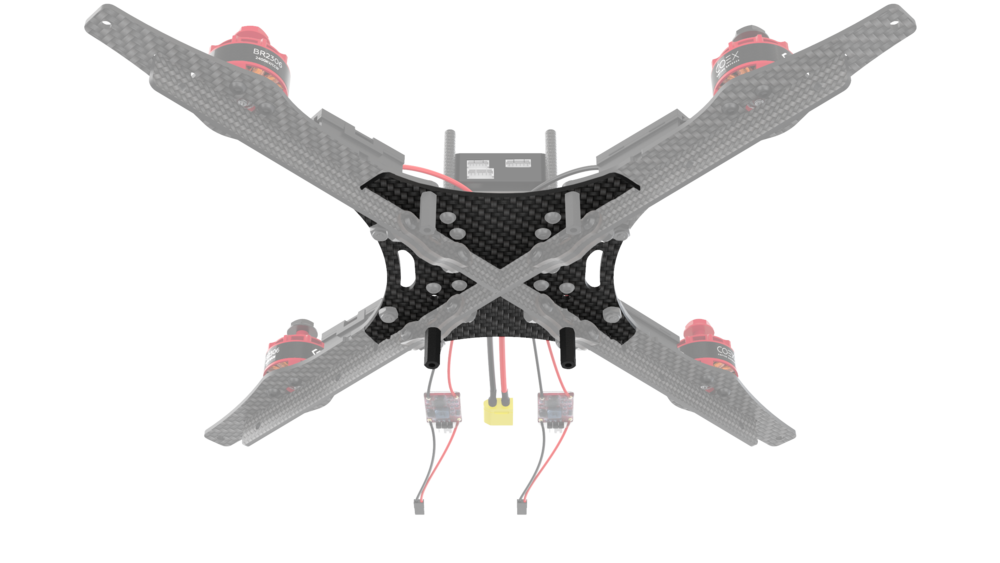
1. Install the support arms on the frame base according to their rotation direction. Use notches as guides.
Perform these actions for each motor.
## Frame assembly
1. Install the support arms on the frame base according to their rotation direction. Use notches as guides.
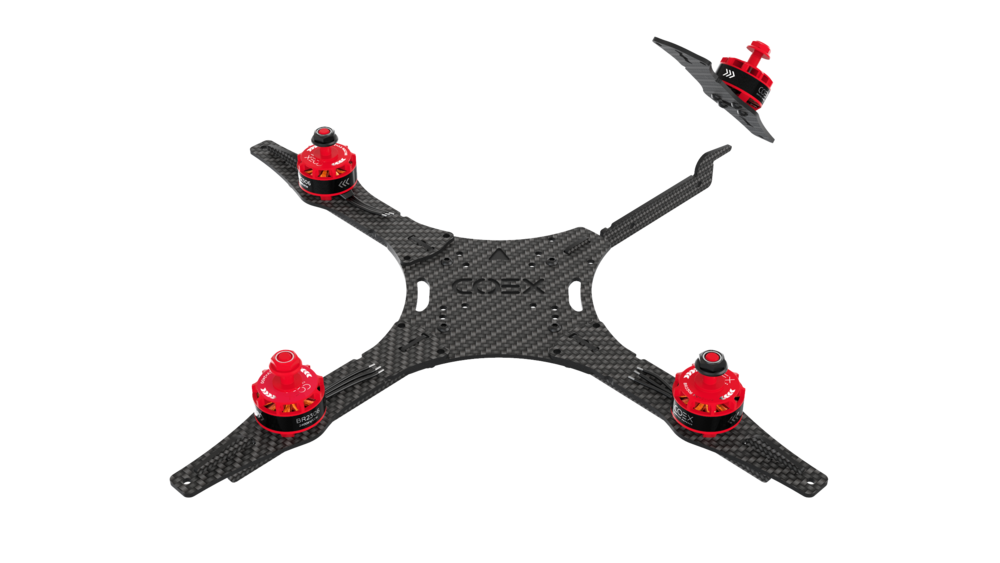 > **Hint** Note the motor nut colors when installing the arms. Motors with red nuts should be placed on the front right and back left arms, with black ones - on the front left and back right arms.
2. Attach the arms to the frame base using 8 M3x8 screws, 6 steel nuts, and 2 15 mm spacers.
## Preparing the power distribution board
1. [Tin](tinning.md) the pads on the power distribution board.
2. Check the board for shorts using a multimeter:
* Set your multimeter to the Continuity Test mode.
* Ensure your multimeter works by connecting the probes to each other. The multimeter should beep.
* Connect one of the probes to the **«+»** pad and the other to **«-»/GND**. If there is a short circuit, the multimeter will beep.
## Mounting the PDB
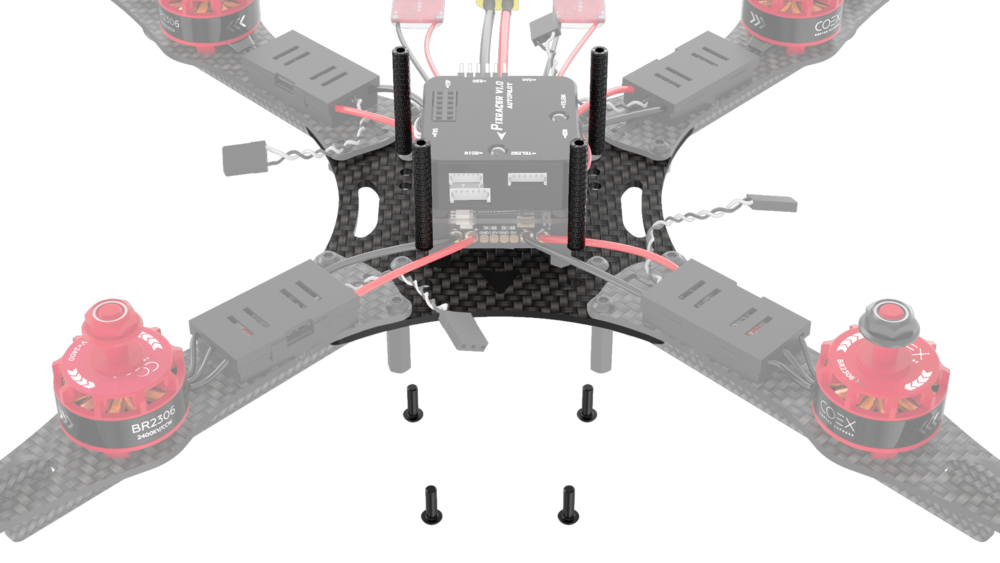
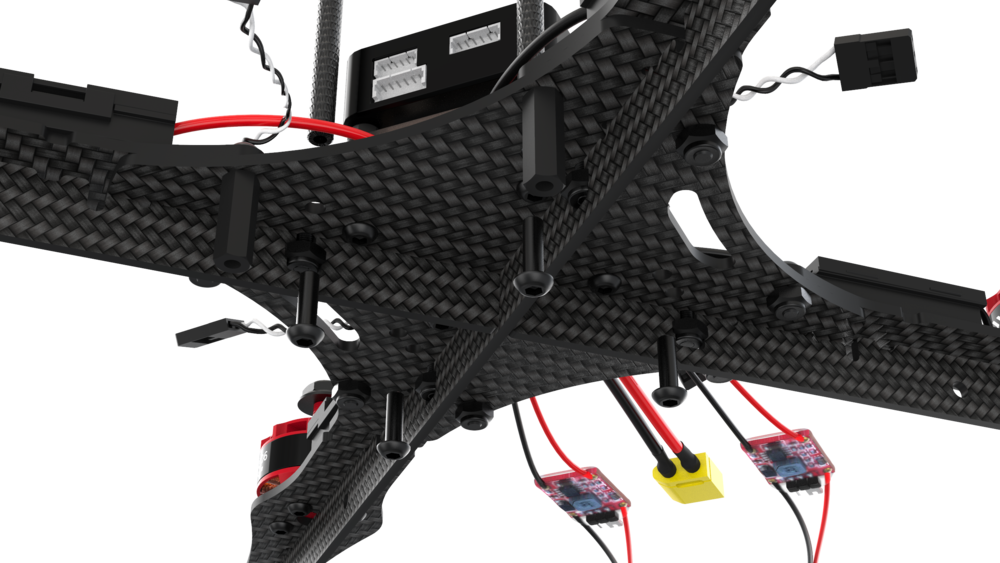
1. Attach four 6 mm standoffs on the top carbon deck using M3x6 screws.
2. Place the PDB on the standoffs.
> **Hint** Note the motor nut colors when installing the arms. Motors with red nuts should be placed on the front right and back left arms, with black ones - on the front left and back right arms.
2. Attach the arms to the frame base using 8 M3x8 screws, 6 steel nuts, and 2 15 mm spacers.
## Preparing the power distribution board
1. [Tin](tinning.md) the pads on the power distribution board.
2. Check the board for shorts using a multimeter:
* Set your multimeter to the Continuity Test mode.
* Ensure your multimeter works by connecting the probes to each other. The multimeter should beep.
* Connect one of the probes to the **«+»** pad and the other to **«-»/GND**. If there is a short circuit, the multimeter will beep.
## Mounting the PDB
1. Attach four 6 mm standoffs on the top carbon deck using M3x6 screws.
2. Place the PDB on the standoffs.
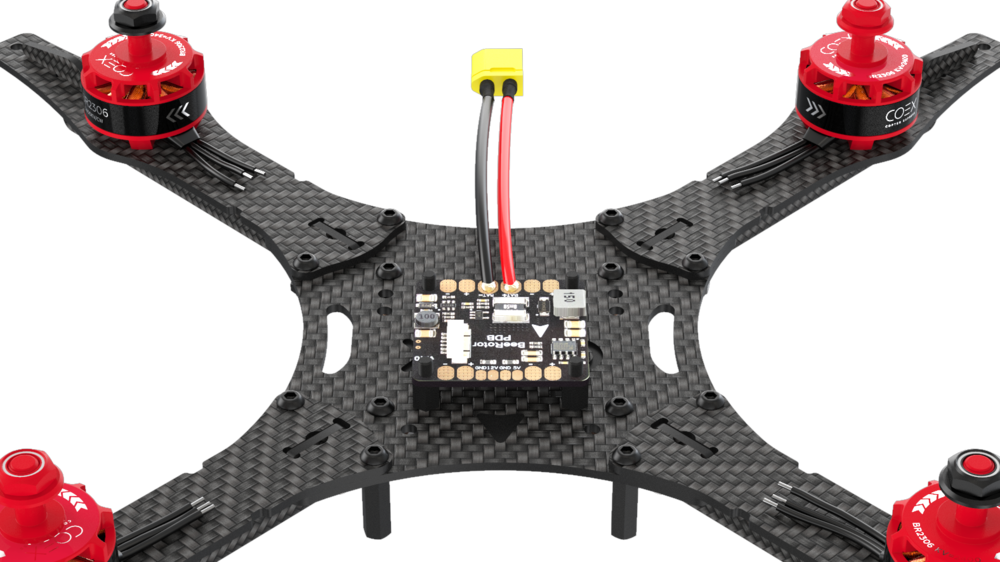 3. Make sure the arrow on the PDB is pointing in the same direction as the arrow on the top carbon deck.
## Soldering the speed controllers and the BEC
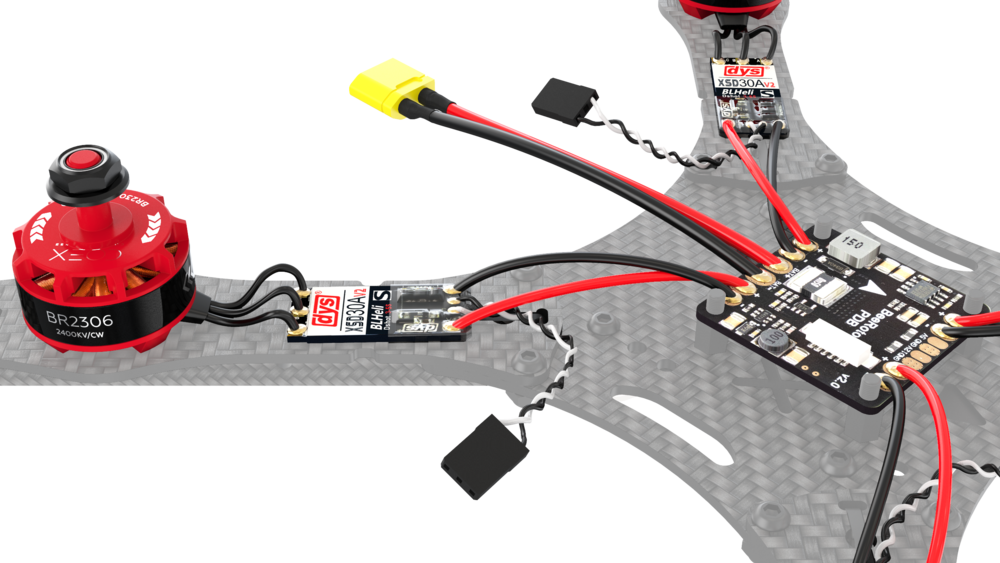
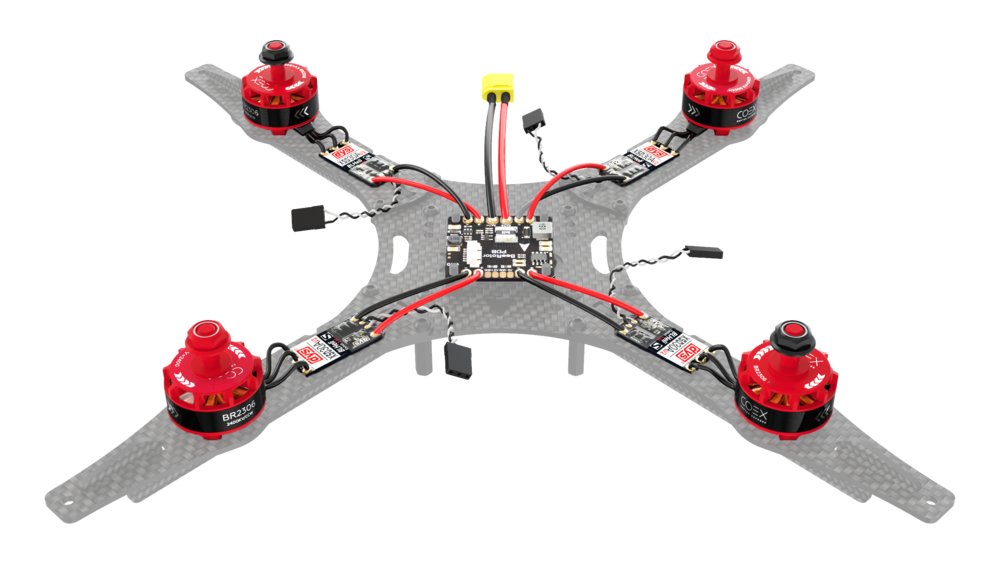
1. Solder the motor wires to the electronic speed controllers (ESCs).
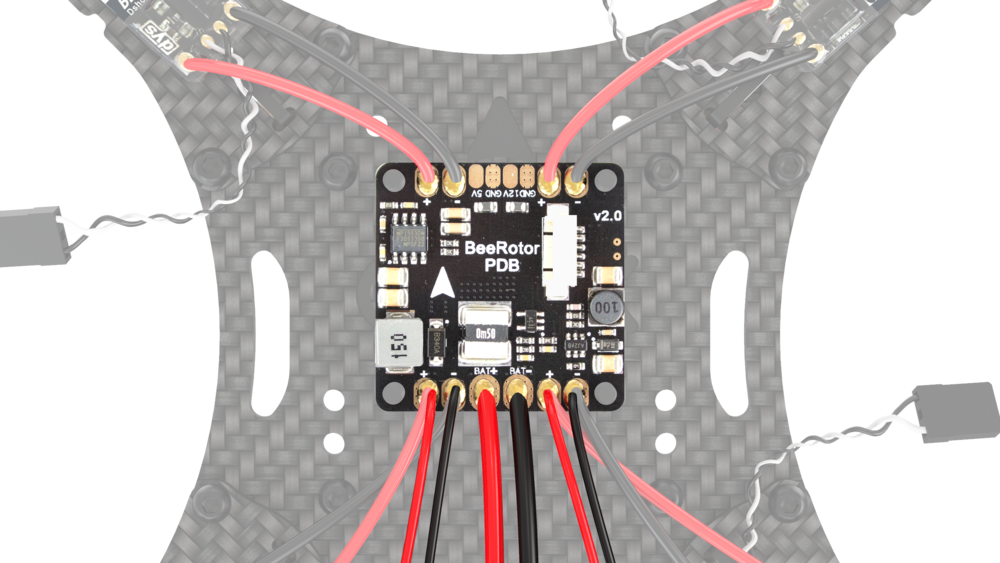
2. Solder the ESC power wires to the power distribution board (**red** to **«+»**, **black** to **«-»**).
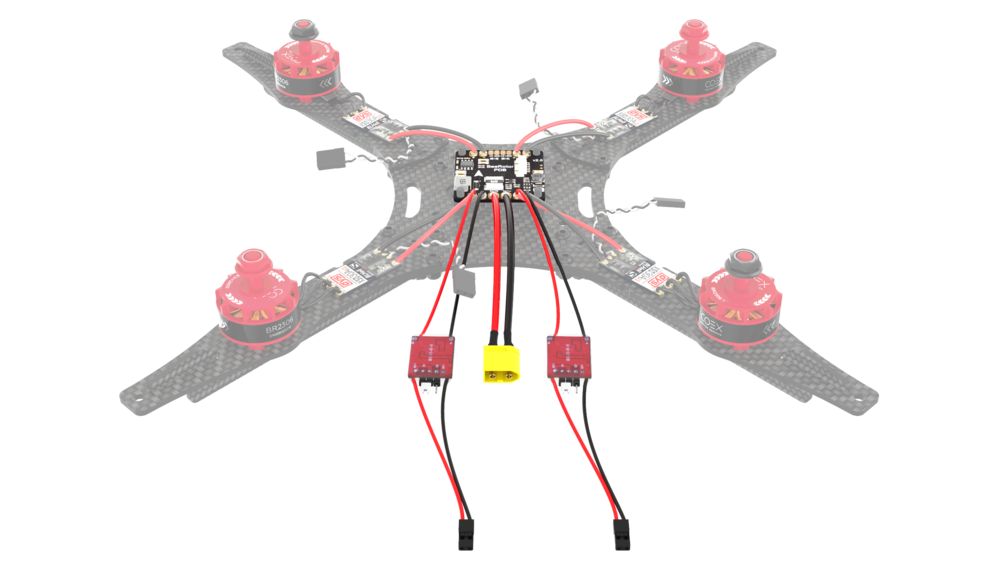
3. Solder power wires of the battery elimination circuit in parallel to one of the ESC power wires (**red** to **«+»**, **black** to **«-»**).
4. Check the board for shorts using a multimeter.
### Setting up PWM mode on RC
Turn on your transmitter using the **POWER** slider. If the RC transmitter is locked, place all controls in their neutral position:
1. Left stick should be in the **lower center position**.
2. Right stick should be **centered**.
3. The switches (A, B, C, D) should be in the **top position**.
3. Make sure the arrow on the PDB is pointing in the same direction as the arrow on the top carbon deck.
## Soldering the speed controllers and the BEC
1. Solder the motor wires to the electronic speed controllers (ESCs).
2. Solder the ESC power wires to the power distribution board (**red** to **«+»**, **black** to **«-»**).
3. Solder power wires of the battery elimination circuit in parallel to one of the ESC power wires (**red** to **«+»**, **black** to **«-»**).
4. Check the board for shorts using a multimeter.
### Setting up PWM mode on RC
Turn on your transmitter using the **POWER** slider. If the RC transmitter is locked, place all controls in their neutral position:
1. Left stick should be in the **lower center position**.
2. Right stick should be **centered**.
3. The switches (A, B, C, D) should be in the **top position**.
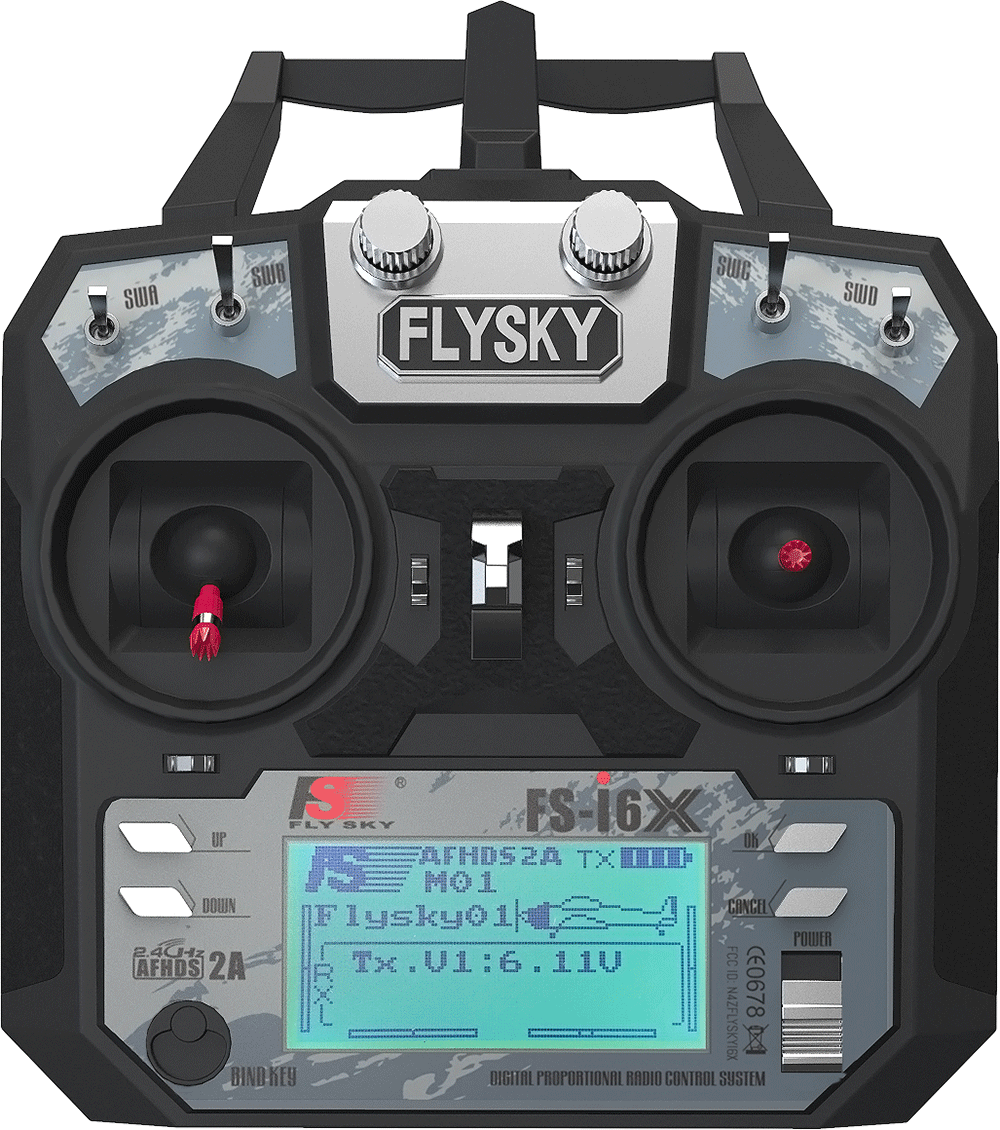 Make sure the transmitter operates in the PWM mode:
1. Power down the receiver.
2. Hold down the "OK" button to enter the menu.
3. Select the "System setup" option, press "OK" to enter the submenu.
4. Select "RX Setup" option.
5. Select "Output mode".
6. Make sure the "PWM" option is selected.
7. Save settings by holding the "Cancel" button.
### Binding the RC transmitter and receiver
1. Turn off the RC transmitter with the **POWER** slider.
2. Connect the RC receiver to the 5 V BEC output. Connect the black wire into one of the bottom pins and the red wire to one of the central pins.
3. Place the binding jumper on the B/VCC output.
4. Connect the battery pack.
5. The LED on the RC receiver should start to blink.
6. Hold down the **BIND KEY** on the RC transmitter.
7. Turn on the RC transmitter while holding the **BIND KEY**
Make sure the transmitter operates in the PWM mode:
1. Power down the receiver.
2. Hold down the "OK" button to enter the menu.
3. Select the "System setup" option, press "OK" to enter the submenu.
4. Select "RX Setup" option.
5. Select "Output mode".
6. Make sure the "PWM" option is selected.
7. Save settings by holding the "Cancel" button.
### Binding the RC transmitter and receiver
1. Turn off the RC transmitter with the **POWER** slider.
2. Connect the RC receiver to the 5 V BEC output. Connect the black wire into one of the bottom pins and the red wire to one of the central pins.
3. Place the binding jumper on the B/VCC output.
4. Connect the battery pack.
5. The LED on the RC receiver should start to blink.
6. Hold down the **BIND KEY** on the RC transmitter.
7. Turn on the RC transmitter while holding the **BIND KEY**
 8. Wait for the **RXBind ok** message on the RC transmitter
9. Disconnect the binding jumper.
10. The LED on the RC receiver should be lit continuously.
### Checking the motor rotation direction
Motors with **red** nuts should rotate **counterclockwise**, the ones with **black** nuts should rotate **clockwise**. Correct rotation direction should also be printed on the motors. You can use a servo tester or your RC transmitter and receiver to check rotation direction.
8. Wait for the **RXBind ok** message on the RC transmitter
9. Disconnect the binding jumper.
10. The LED on the RC receiver should be lit continuously.
### Checking the motor rotation direction
Motors with **red** nuts should rotate **counterclockwise**, the ones with **black** nuts should rotate **clockwise**. Correct rotation direction should also be printed on the motors. You can use a servo tester or your RC transmitter and receiver to check rotation direction.
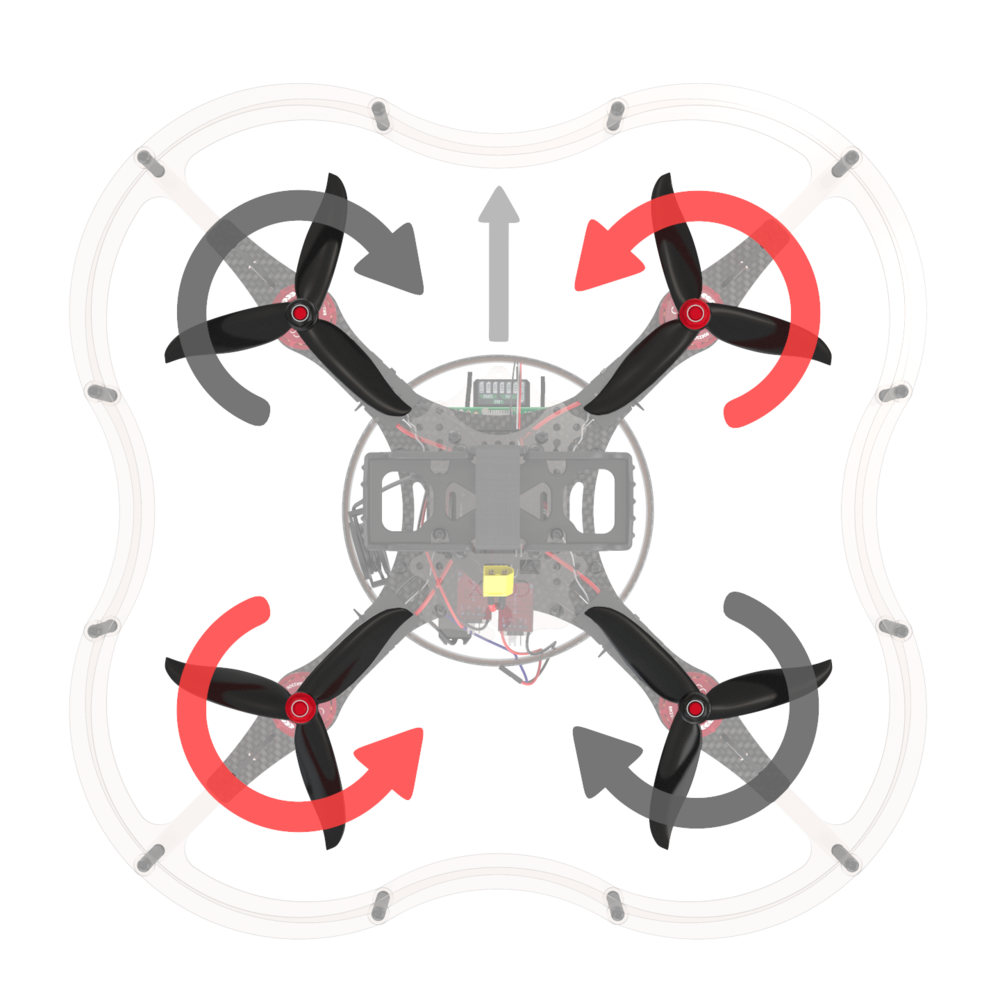 1. Disconnect the battery pack and power down the transmitter.
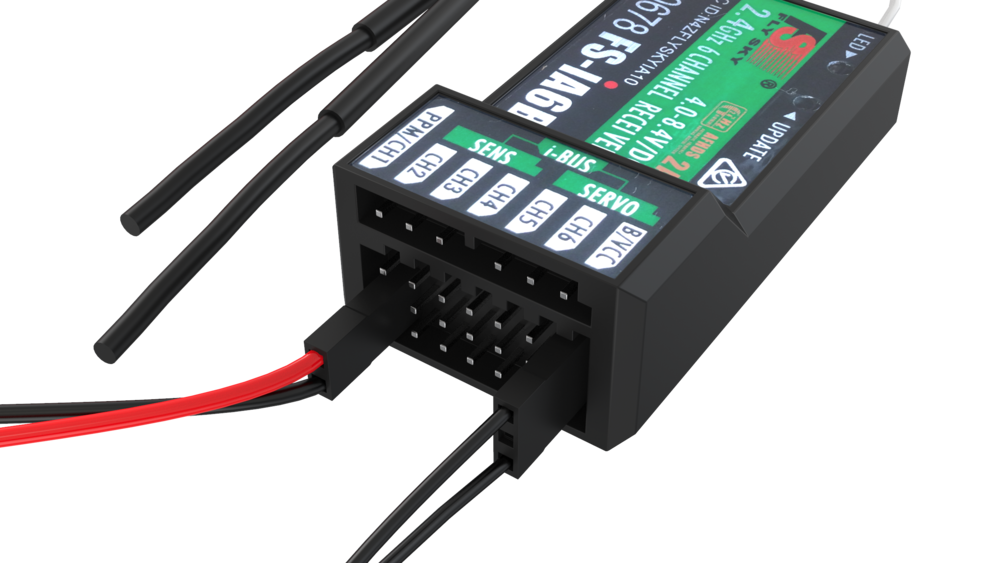
2. Connect the signal wires from the ESC to CH3 pins on the output. The white wire should go to the top pin, the black one should go to the bottom one.
3. Power on the transmitter. Make sure the left stick is in the bottom position.
4. Connect the battery pack.
5. Slowly move the left stick up until the motor starts to spin.
If the motor rotation direction is wrong, switch any two motor wires.
> **Info** You can also change motor direction by reprogramming the speed controllers. The process is described [in the ESC firmware flashing article](esc_firmware.md).
Do this for each motor.
### Switching the transmitter back to PPM mode
The flight controller expects PPM signal from your RC gear. Switch your transmitter back to PPM before flight.
1. Make sure the receiver is not powered.
2. Hold down the "OK" button to enter the menu.
3. Select the "System setup" option, press "OK" to enter the submenu.
4. Select "RX Setup" option.
5. Select "Output mode".
6. Make sure the "PPM" option is selected.
7. Save settings by holding the "Cancel" button.
## Mounting the flight controller plate
1. Attach four 6 mm standoffs on top of PDB.
1. Disconnect the battery pack and power down the transmitter.
2. Connect the signal wires from the ESC to CH3 pins on the output. The white wire should go to the top pin, the black one should go to the bottom one.
3. Power on the transmitter. Make sure the left stick is in the bottom position.
4. Connect the battery pack.
5. Slowly move the left stick up until the motor starts to spin.
If the motor rotation direction is wrong, switch any two motor wires.
> **Info** You can also change motor direction by reprogramming the speed controllers. The process is described [in the ESC firmware flashing article](esc_firmware.md).
Do this for each motor.
### Switching the transmitter back to PPM mode
The flight controller expects PPM signal from your RC gear. Switch your transmitter back to PPM before flight.
1. Make sure the receiver is not powered.
2. Hold down the "OK" button to enter the menu.
3. Select the "System setup" option, press "OK" to enter the submenu.
4. Select "RX Setup" option.
5. Select "Output mode".
6. Make sure the "PPM" option is selected.
7. Save settings by holding the "Cancel" button.
## Mounting the flight controller plate
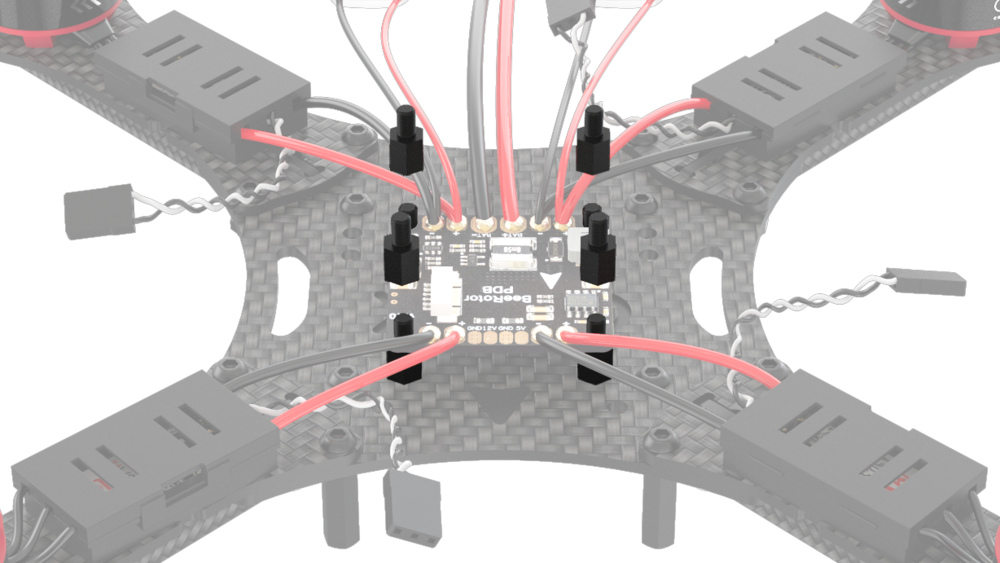
1. Attach four 6 mm standoffs on top of PDB.
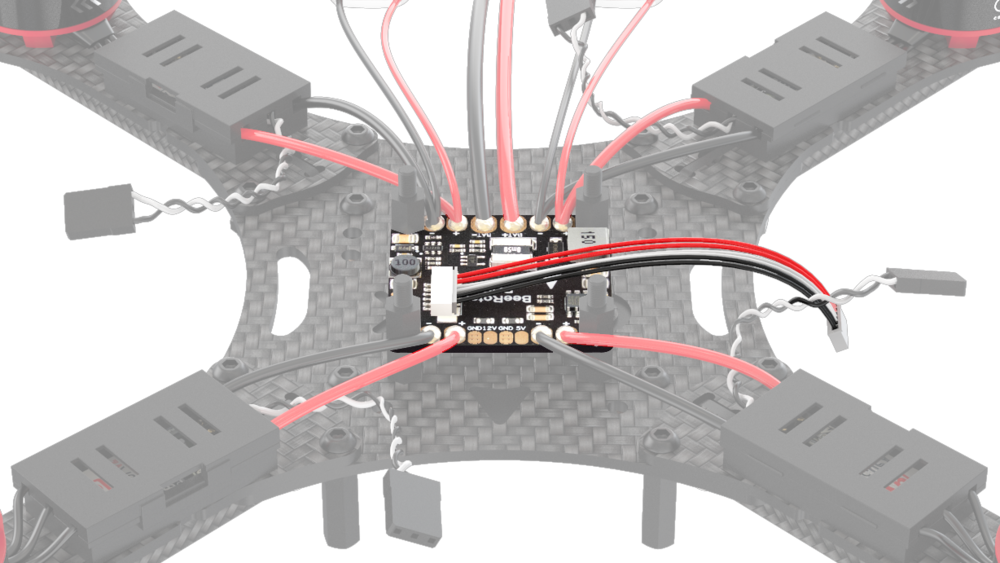
 2. Connect the flight controller power cable to the PDB.
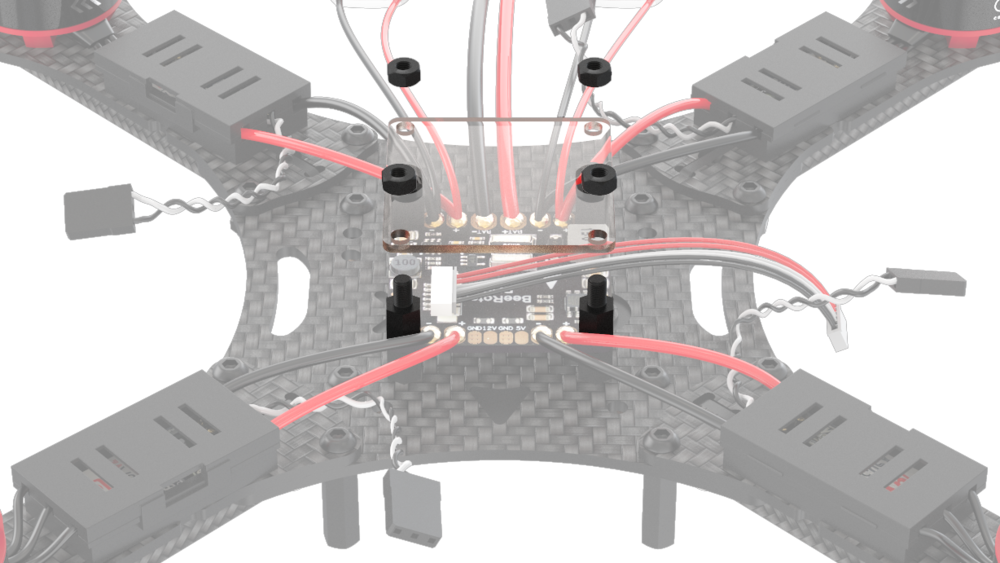
 3. Place the polycarbonate plate on the standoffs and fix them with plastic nuts.
 ## Mounting the flight controller
1. Insert the microSD card into your flight controller.
## Mounting the flight controller
1. Insert the microSD card into your flight controller.
 2. Align the flight controller so that the arrows on the controller and on the top carbon deck point in the same direction.
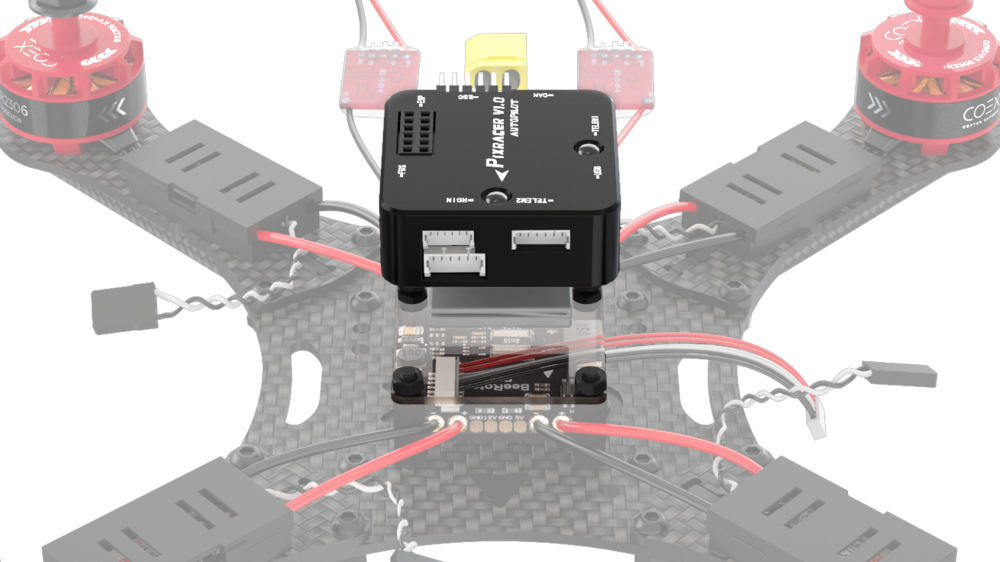 3. Attach the flight controller to the flight controller plate using 3M double-sided adhesive pads.
4. Connect the power cable to the **"POWER"** input of the flight controller.
5. Attach four 40 mm aluminum spacers to the top carbon deck using M3x10 screws.
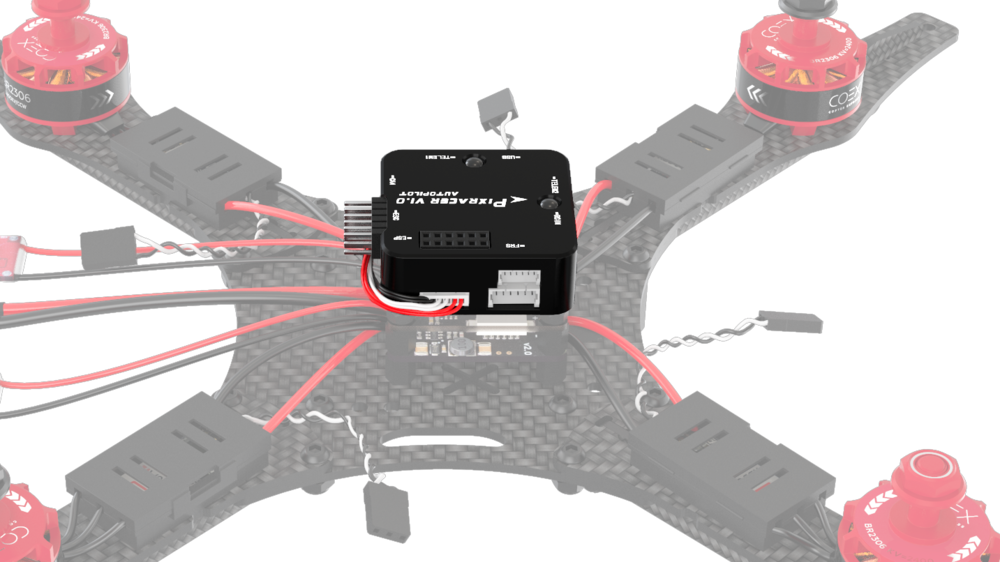
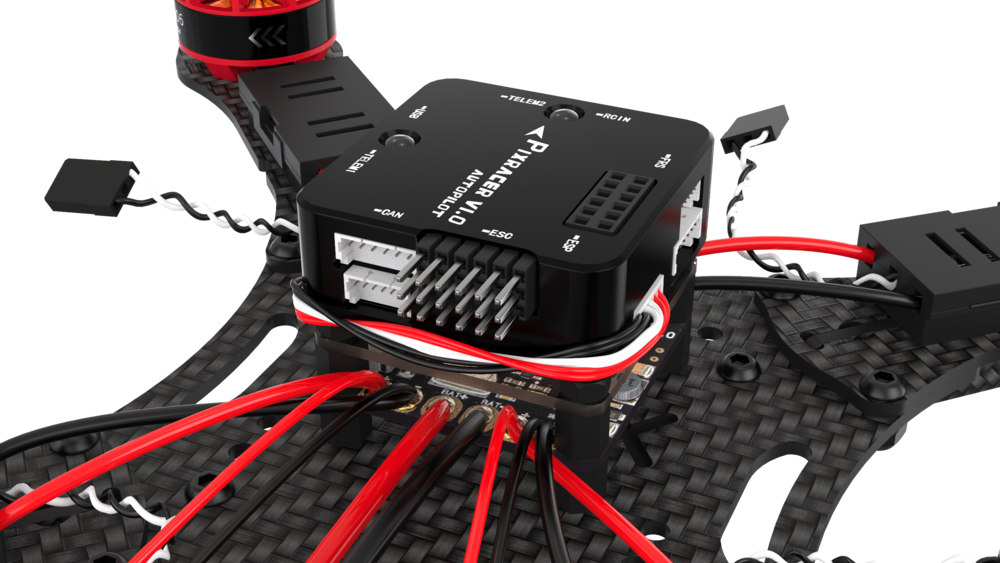
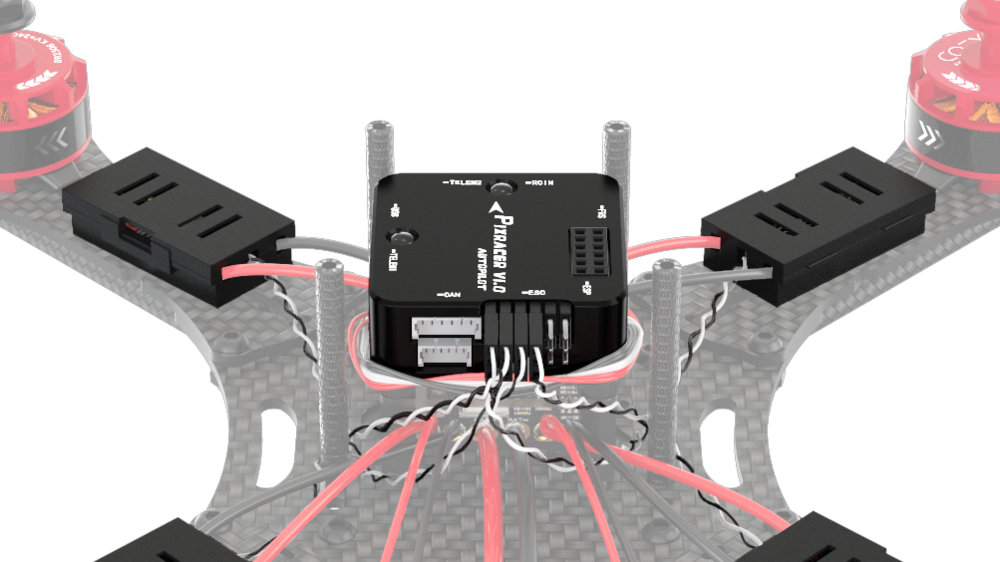
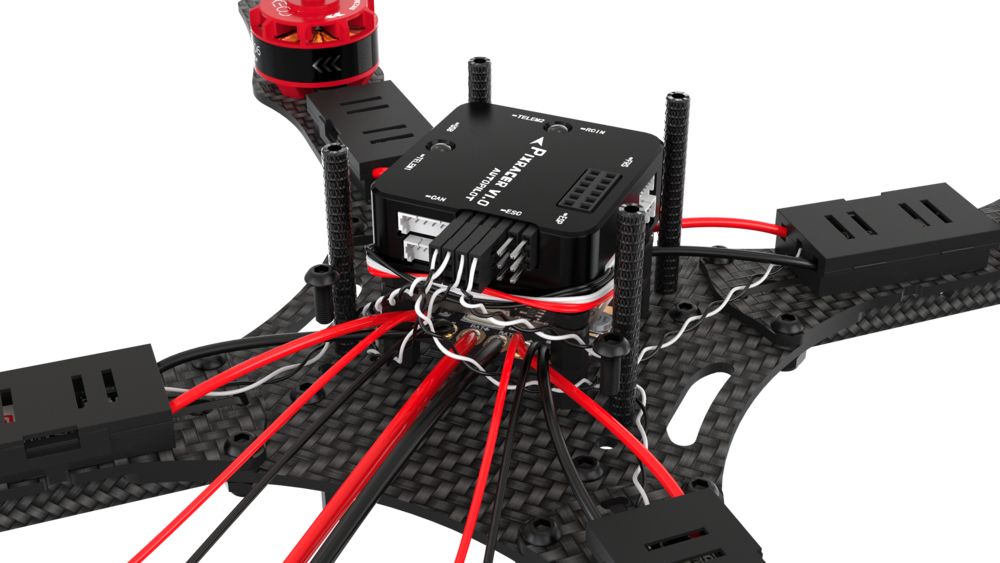
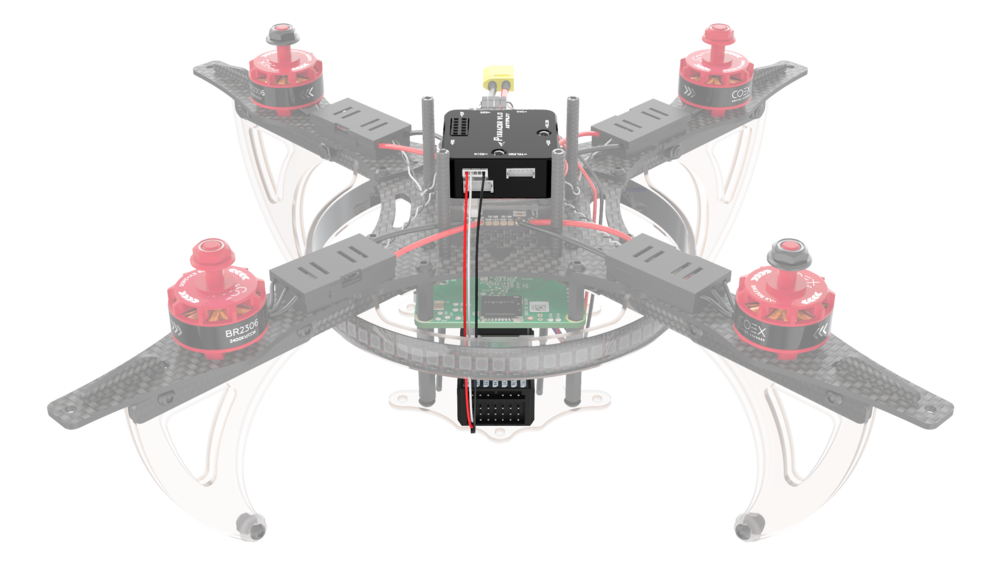
6. Connect signal wires to the flight controller as shown in these pictures:
7. Attach two 15 mm spacers to the top carbon deck using M3x8 screws.
8. Attach two 15 mm spacers to the top carbon deck and the front arms using M3x10 screws (this was already described in the "Frame Assembly" section, p. 2).
## Mounting the LED strip ring
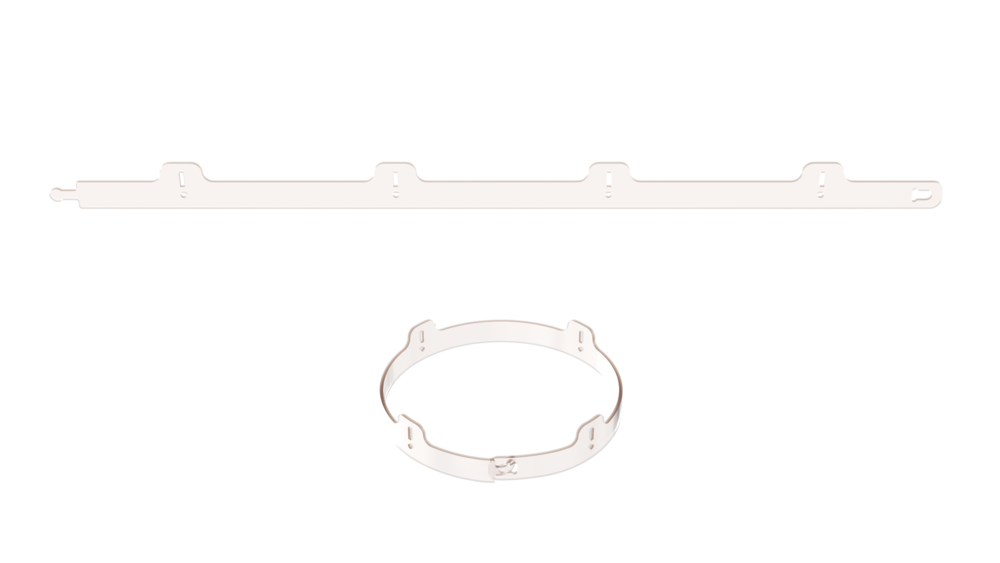
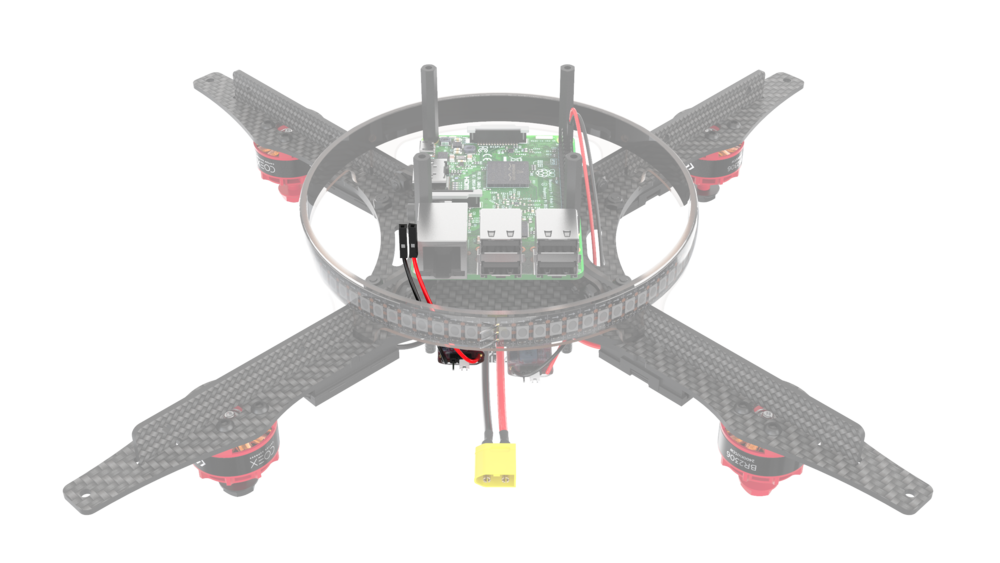
1. Bend the polycarbonate strip into a ring and use the locks to fix it in this shape.
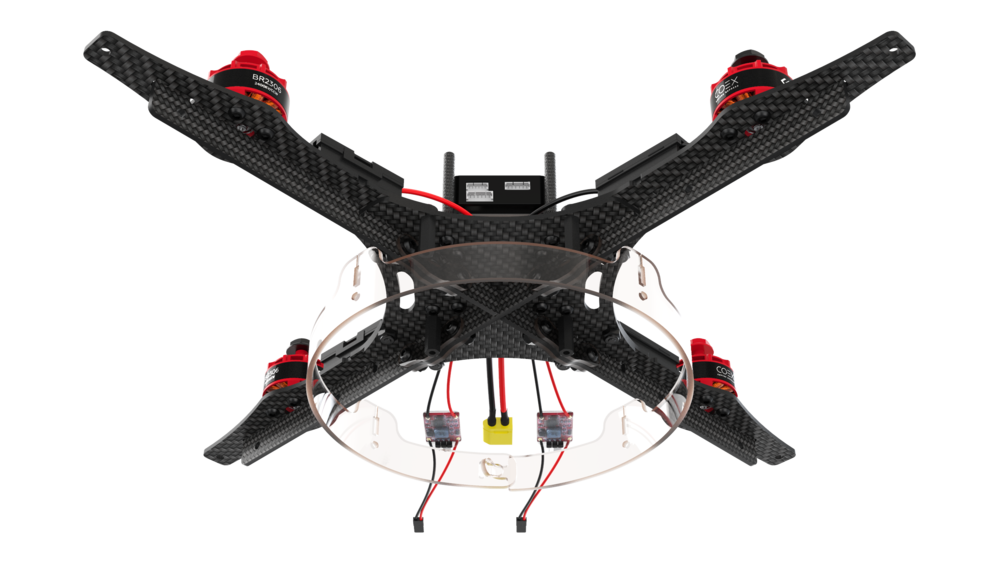
2. Fix the ring on the frame using appropriate notches.
## Installing the Raspberry Pi
1. Insert your microSD card [with our image](image.md) into the Raspberry Pi
3. Attach the flight controller to the flight controller plate using 3M double-sided adhesive pads.
4. Connect the power cable to the **"POWER"** input of the flight controller.
5. Attach four 40 mm aluminum spacers to the top carbon deck using M3x10 screws.
6. Connect signal wires to the flight controller as shown in these pictures:
7. Attach two 15 mm spacers to the top carbon deck using M3x8 screws.
8. Attach two 15 mm spacers to the top carbon deck and the front arms using M3x10 screws (this was already described in the "Frame Assembly" section, p. 2).
## Mounting the LED strip ring
1. Bend the polycarbonate strip into a ring and use the locks to fix it in this shape.
2. Fix the ring on the frame using appropriate notches.
## Installing the Raspberry Pi
1. Insert your microSD card [with our image](image.md) into the Raspberry Pi
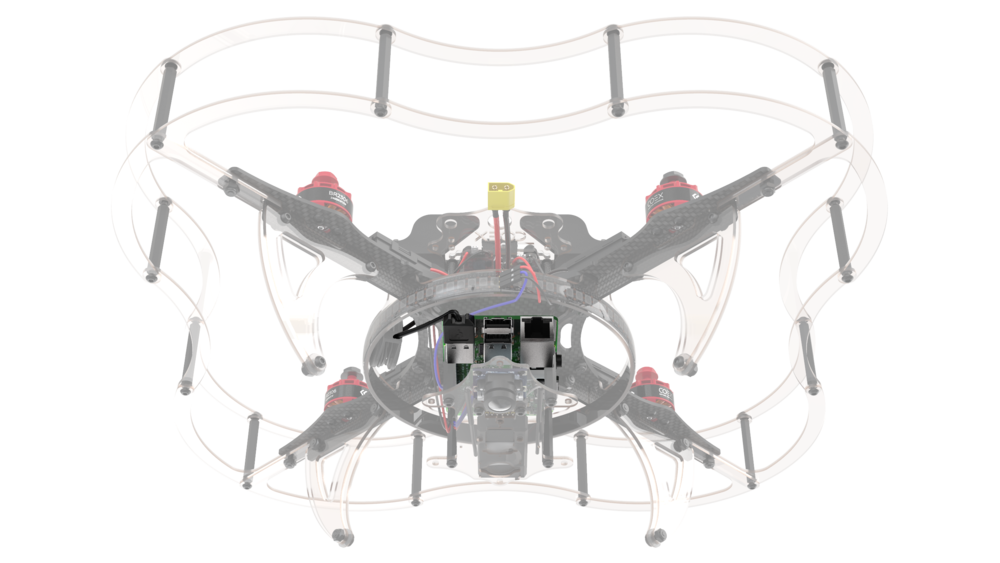
 2. Attach the Raspberry Pi using four standoffs.
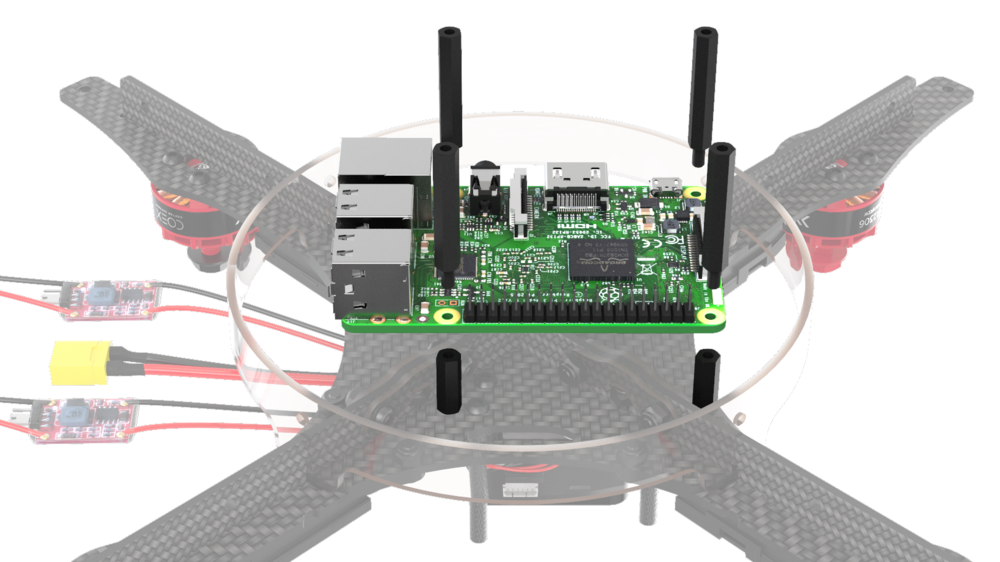 3. Route the BEC wires through the channel in the top carbon deck.
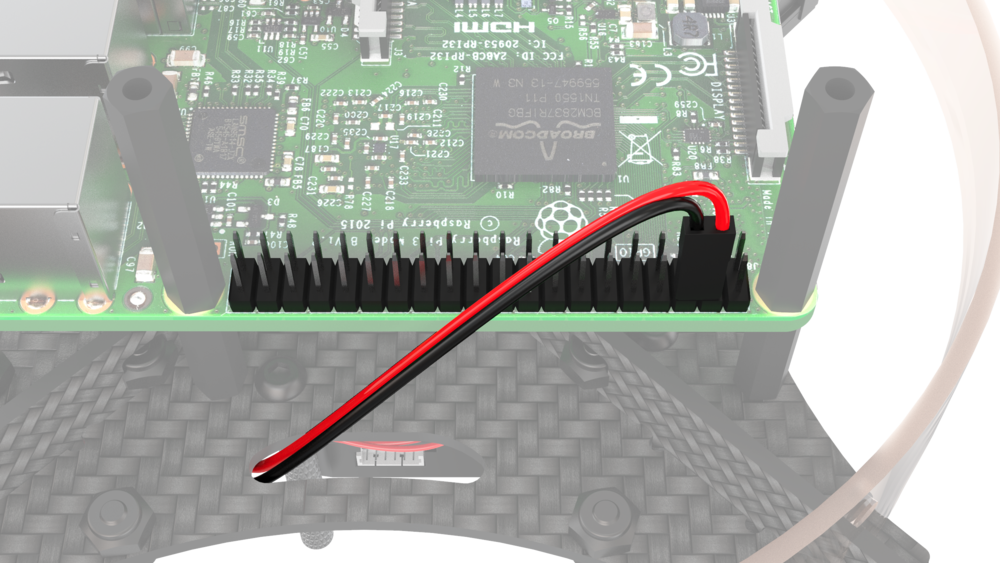
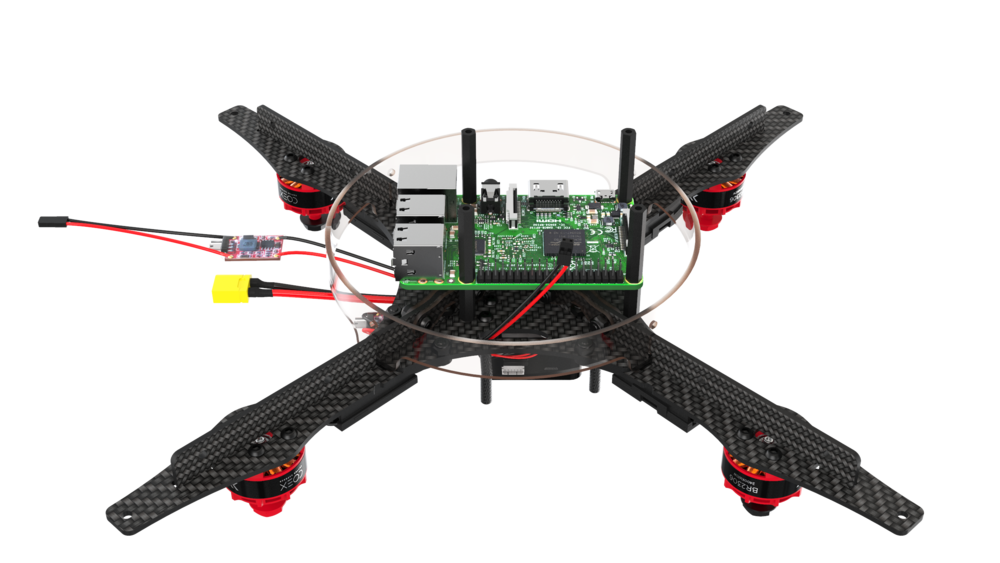 4. Connect the BEC outputs according to the following image:
 ## Installing the LED strip on the LED strip ring
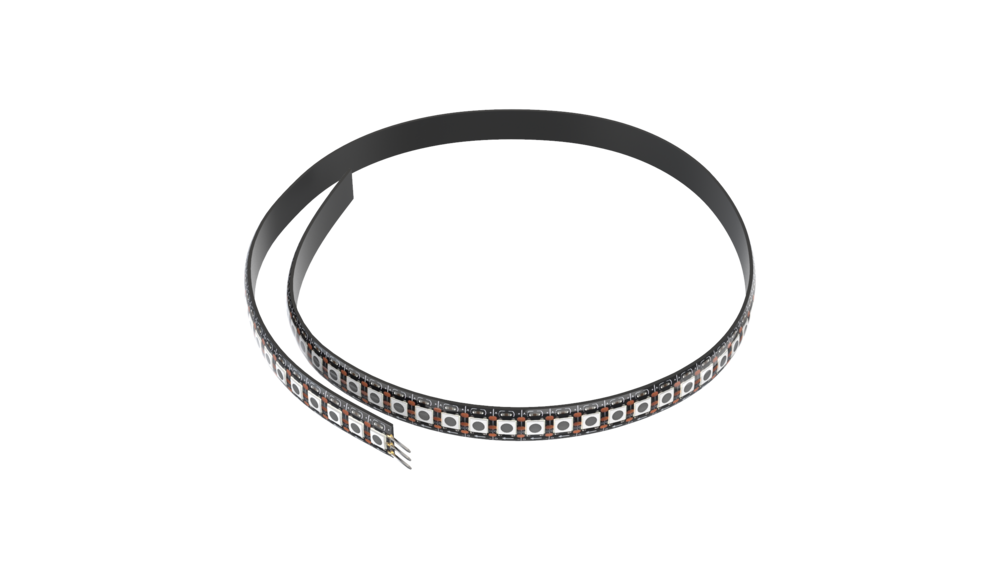
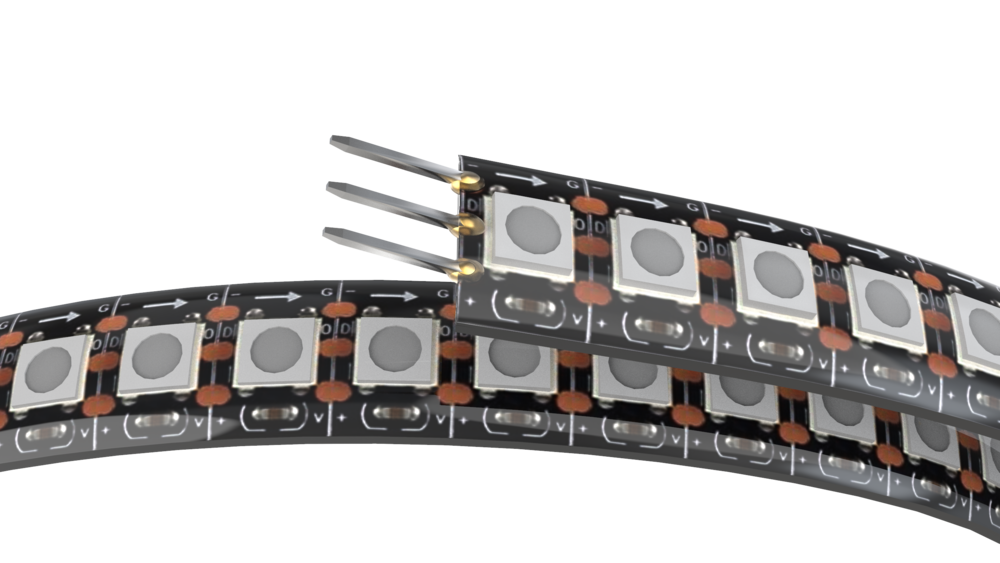
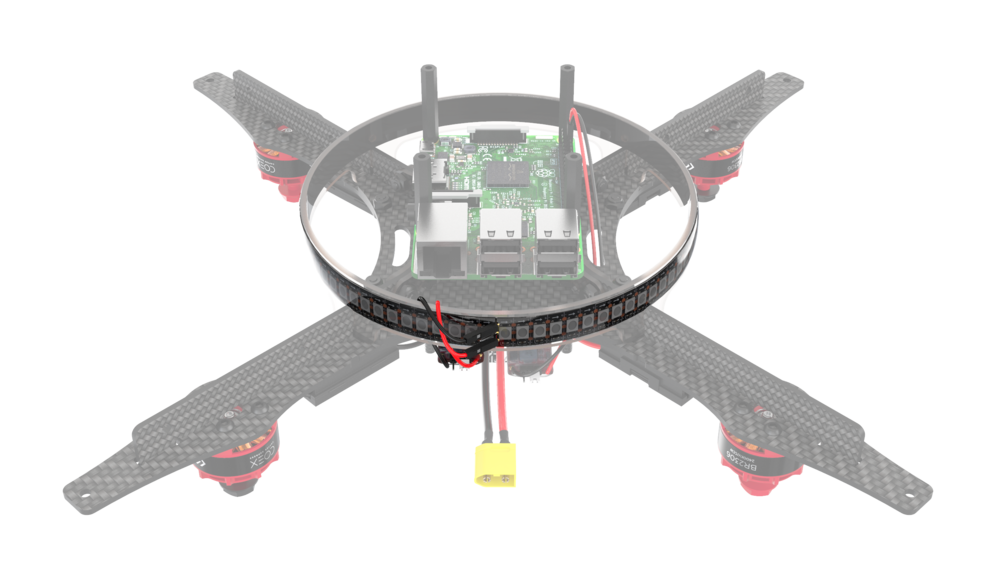
1. Check wires on the strip (and solder them on if they're missing)
2. Attach the LED strip to the ring using the adhesive layer on the strip. Use zip ties to fix it in place.
## Installing the LED strip on the LED strip ring
1. Check wires on the strip (and solder them on if they're missing)
2. Attach the LED strip to the ring using the adhesive layer on the strip. Use zip ties to fix it in place.
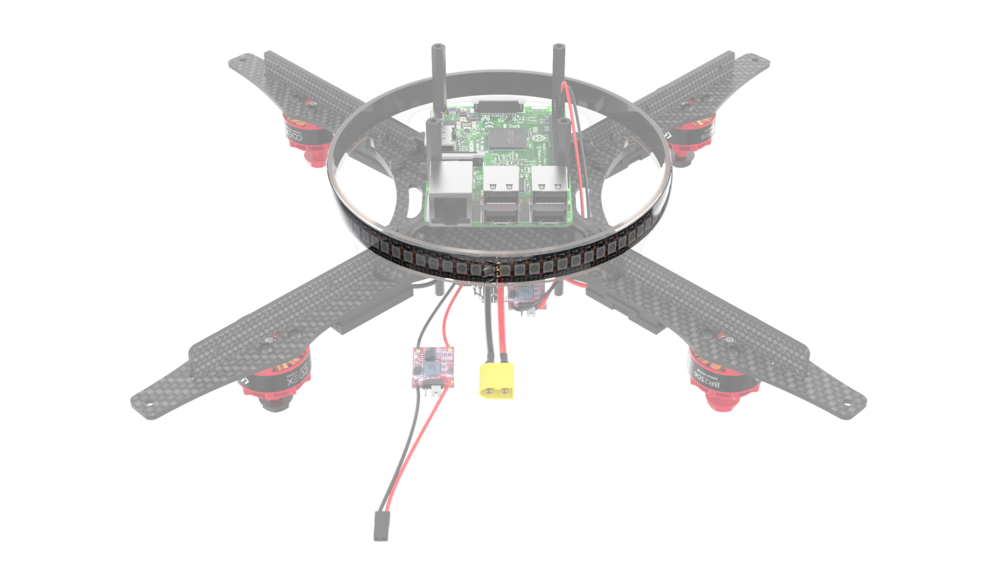 ## Connecting the LED strip to Raspberry Pi
1. Power the LED strip from a separate BEC. Connect the **«+»** and **«-»** leads to **5v** and **Ground** respectively.
2. Connect the **D** lead to GPIO21 (consult the [relevant article](leds.md) for more information).
## Connecting the LED strip to Raspberry Pi
1. Power the LED strip from a separate BEC. Connect the **«+»** and **«-»** leads to **5v** and **Ground** respectively.
2. Connect the **D** lead to GPIO21 (consult the [relevant article](leds.md) for more information).
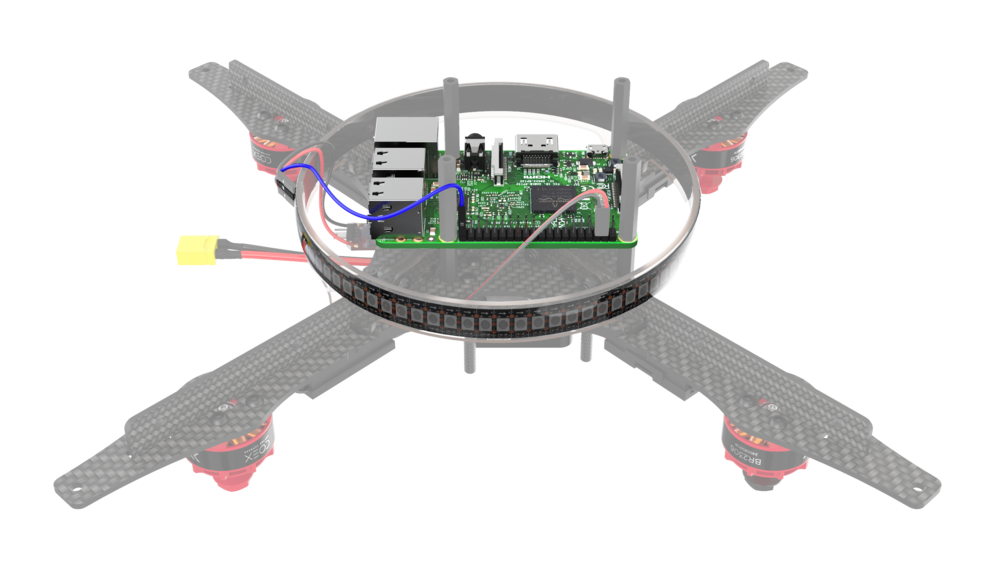 ## Installing the camera cable
1. Open the slot connector by lifting the T-clip.
2. Insert the ribbon cable.
3. Press the T-clip down to secure the cable.
## Installing the camera cable
1. Open the slot connector by lifting the T-clip.
2. Insert the ribbon cable.
3. Press the T-clip down to secure the cable.
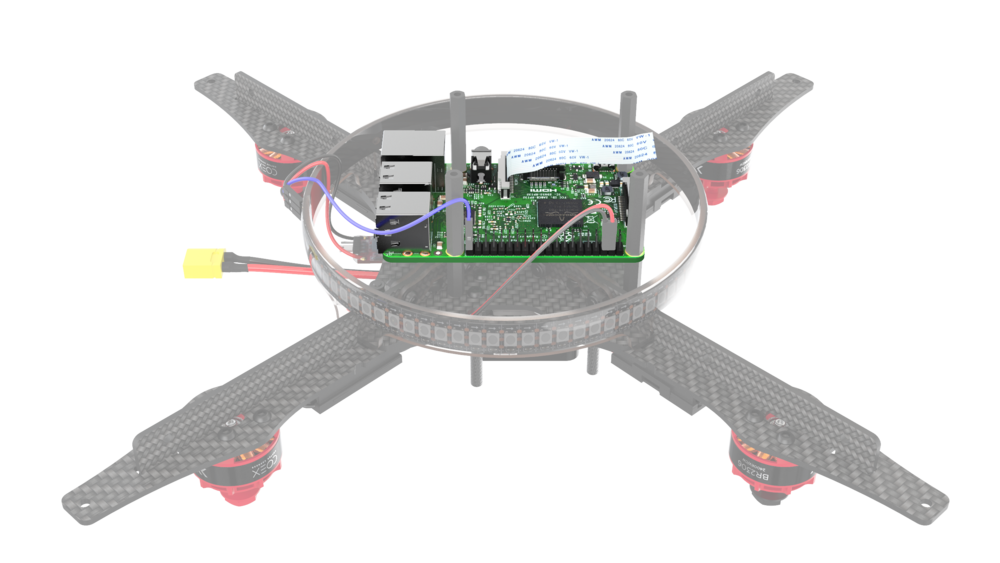 ## Mounting the lower deck periphery
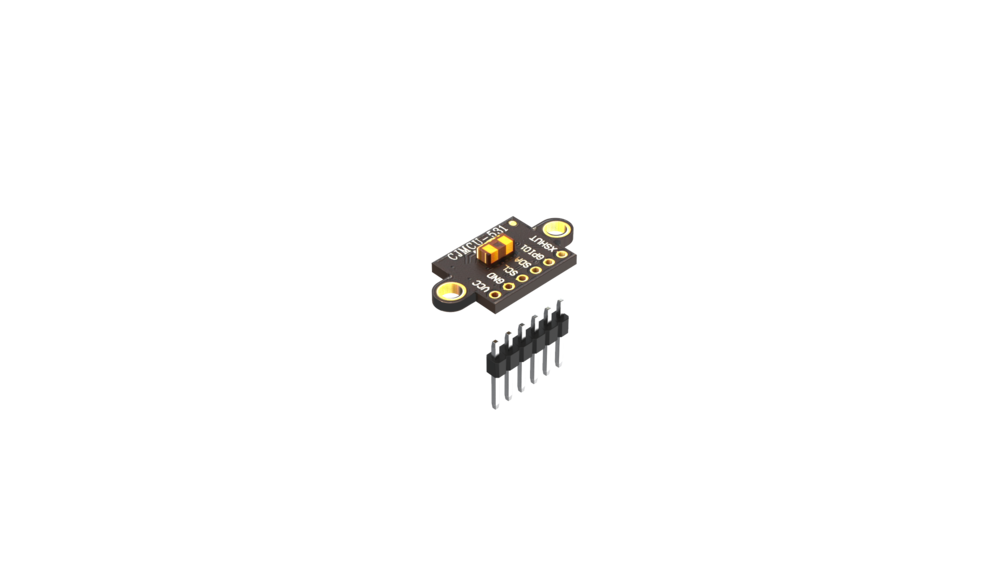
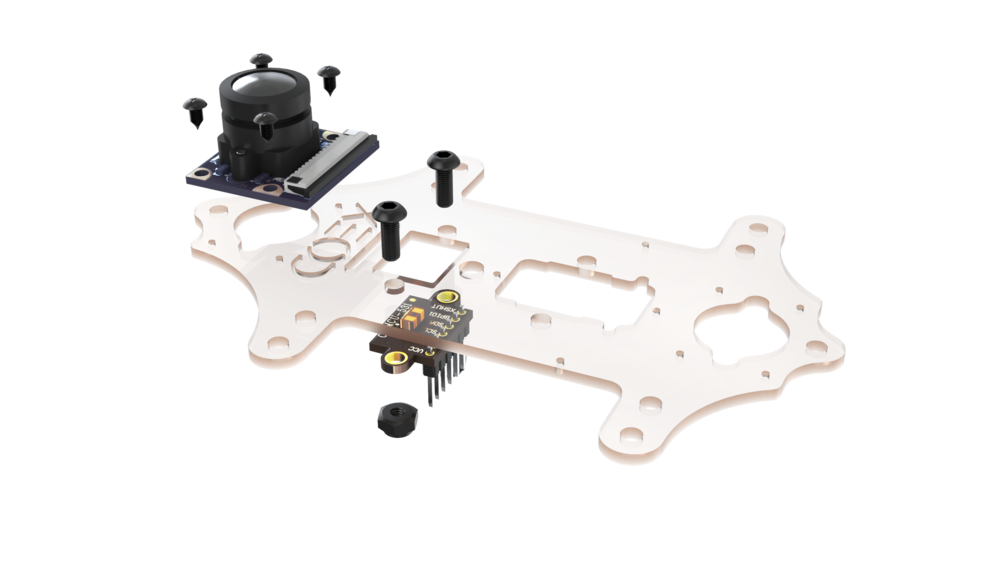
1. Prepare the laser rangefinder by soldering leads to it.
2. Use four 2x5 self-tapping screws to secure the camera.
> **Warning** Make sure the screws don't touch any components on the camera PCB! Otherwise the camera may not function properly.
3. Mount the laser rangefinder on the lower deck using two M3x8 screws and steel nuts.
4. Attach RC receiver to the lower deck using 3M double-sided adhesive pads.
## Mounting the lower deck periphery
1. Prepare the laser rangefinder by soldering leads to it.
2. Use four 2x5 self-tapping screws to secure the camera.
> **Warning** Make sure the screws don't touch any components on the camera PCB! Otherwise the camera may not function properly.
3. Mount the laser rangefinder on the lower deck using two M3x8 screws and steel nuts.
4. Attach RC receiver to the lower deck using 3M double-sided adhesive pads.
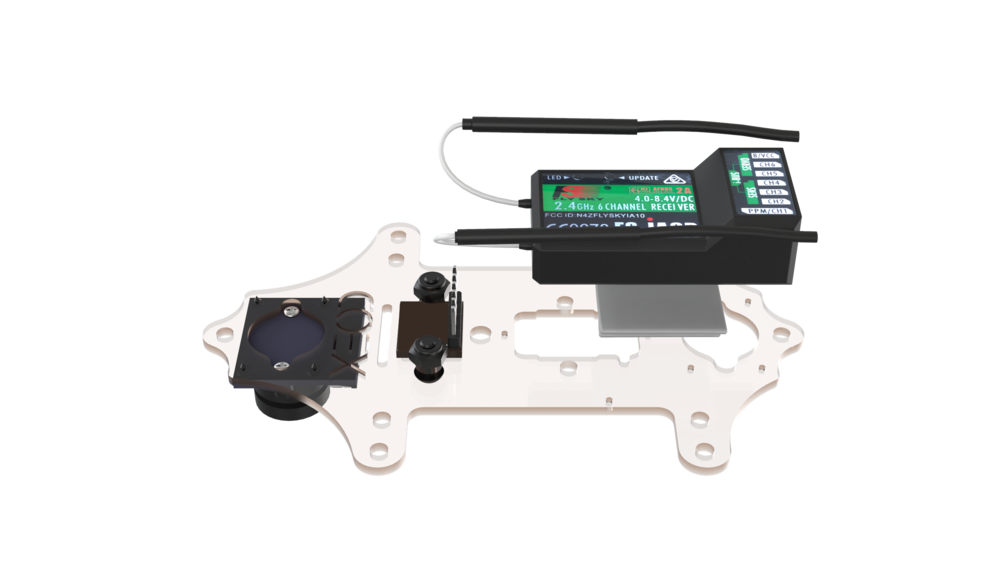 5. Mount the lower deck assembly using four M3x10 screws.
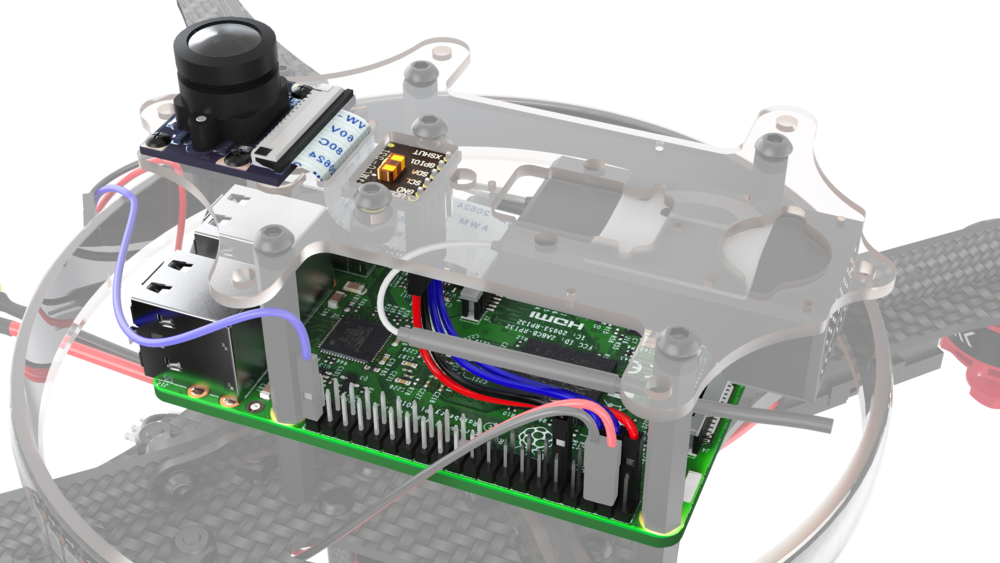
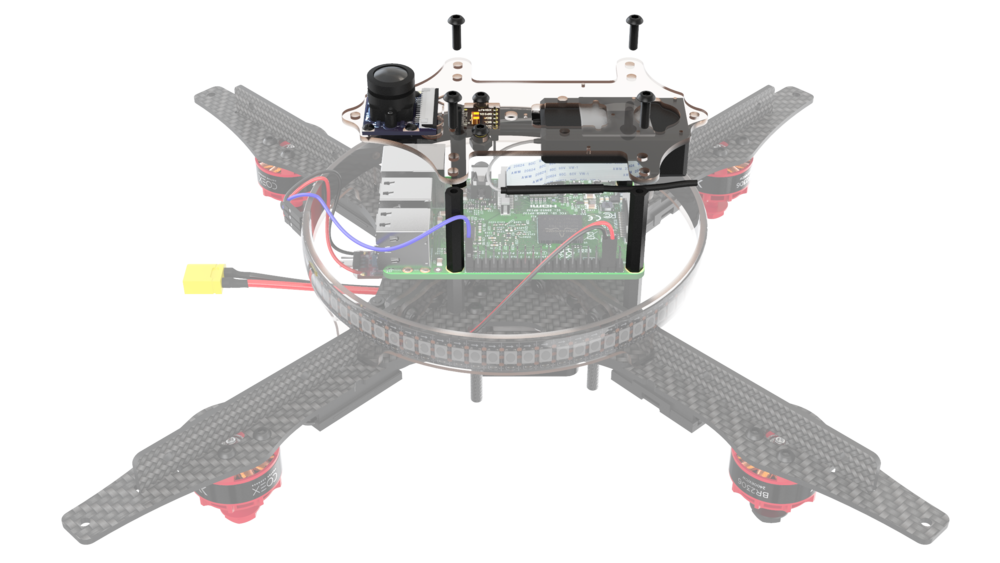 6. Connect the camera ribbon cable to the camera.
7. Connect the laser rangefinder to the Raspberry Pi using the following pinout:
* Connect **VCC** to pin 1 (**3v3**)
* Connect **GND** to pin 9 (**Ground**)
* Connect **SDA** to pin 3 (**GPIO2**)
* Connect **SCL** to pin 5 (**GPIO3**)
6. Connect the camera ribbon cable to the camera.
7. Connect the laser rangefinder to the Raspberry Pi using the following pinout:
* Connect **VCC** to pin 1 (**3v3**)
* Connect **GND** to pin 9 (**Ground**)
* Connect **SDA** to pin 3 (**GPIO2**)
* Connect **SCL** to pin 5 (**GPIO3**)
 ## Mounting the landing gear
1. Attach 8 landing gear pieces using M3x10 screws and steel nuts.
2. Attach dampening pads to the landing gear pieces using M3x10 screws and steel nuts.
## Mounting the landing gear
1. Attach 8 landing gear pieces using M3x10 screws and steel nuts.
2. Attach dampening pads to the landing gear pieces using M3x10 screws and steel nuts.
 ## Connecting the cables
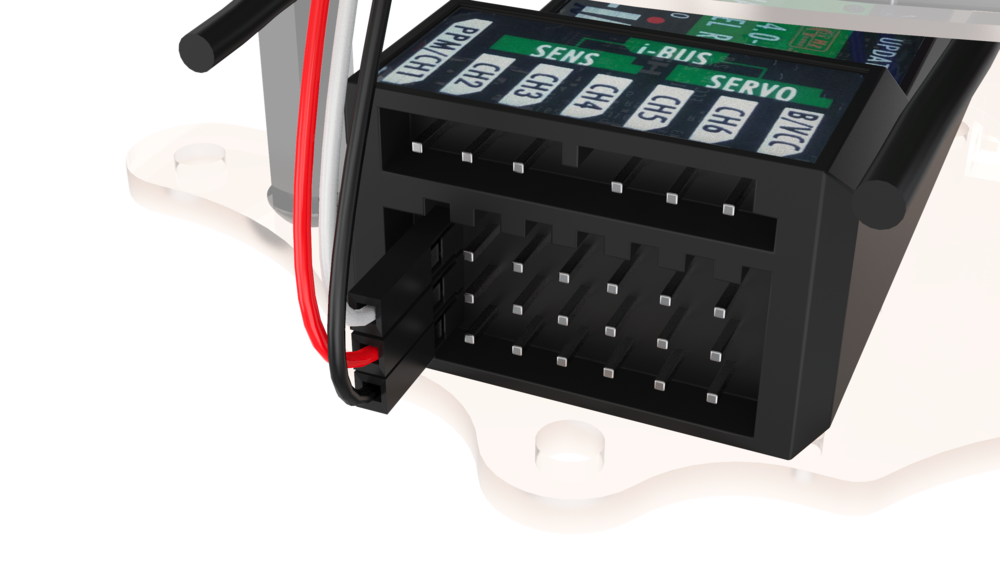
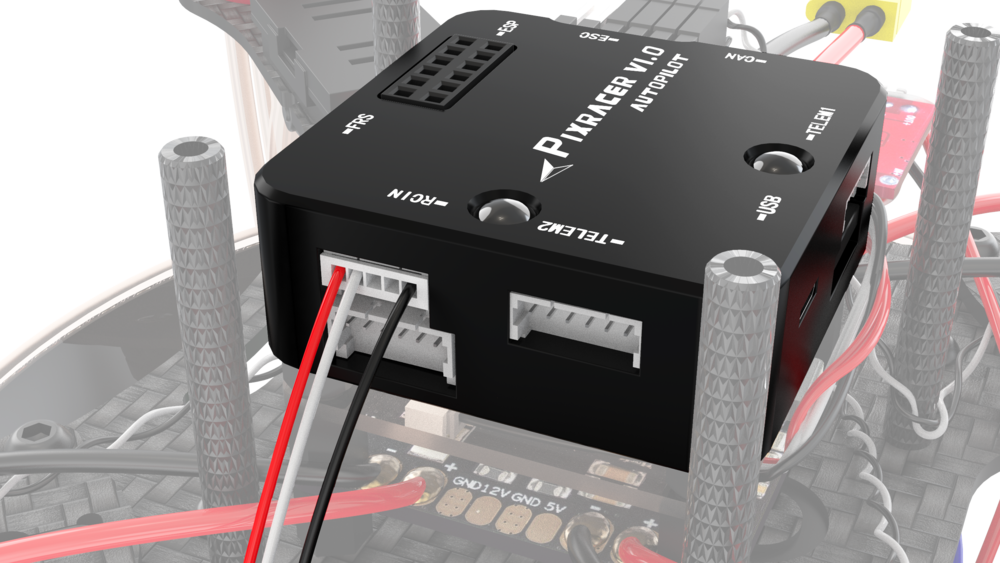
1. Connect RC cable to the **RCIN** port on the flight controller.
## Connecting the cables
1. Connect RC cable to the **RCIN** port on the flight controller.
 2. Connect RC cable to RC receiver.
## Mounting the propeller guards
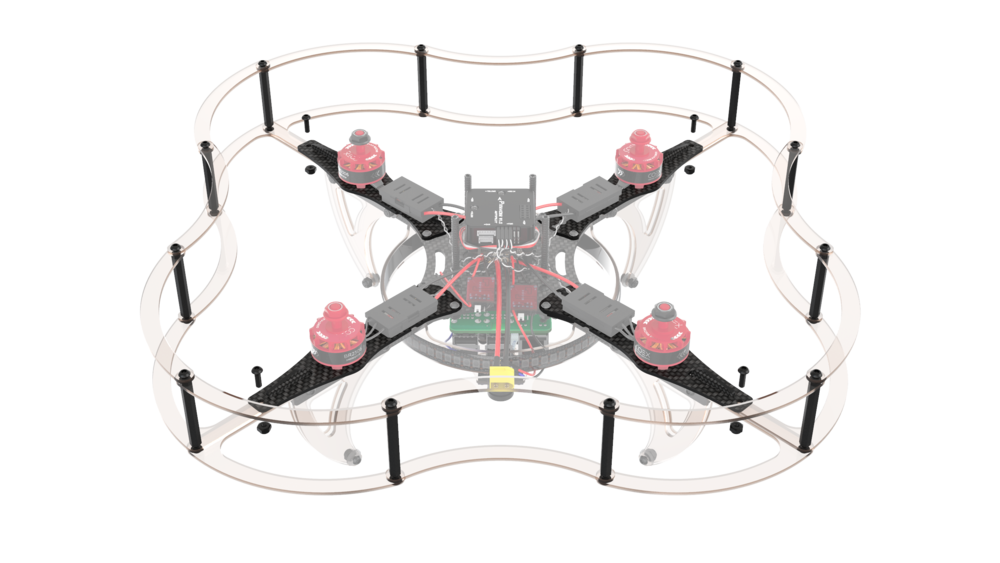
1. Assemble the lower part of the guards using twelve M3x10 screws and twelve 40 mm plastic spacers.
2. Connect RC cable to RC receiver.
## Mounting the propeller guards
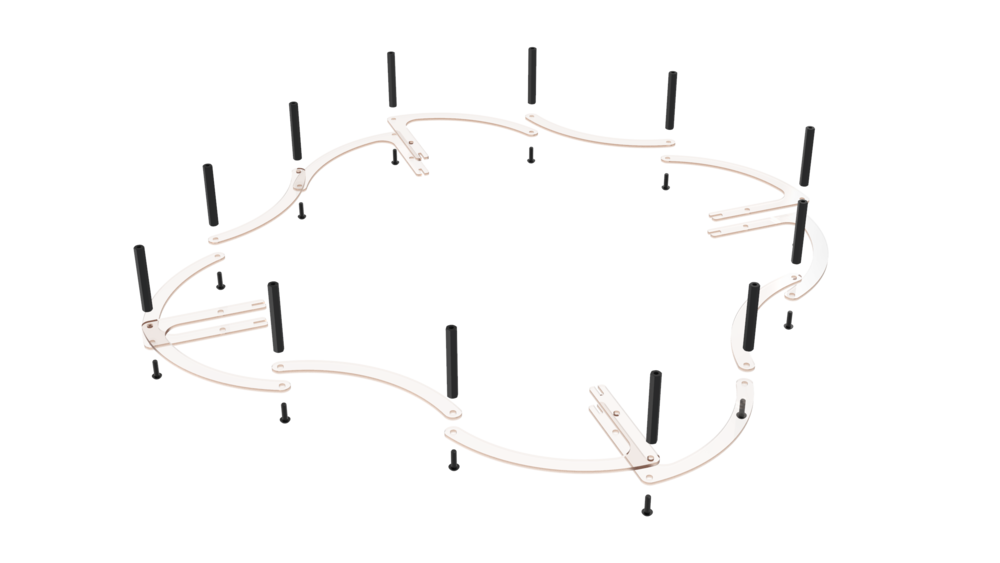
1. Assemble the lower part of the guards using twelve M3x10 screws and twelve 40 mm plastic spacers.
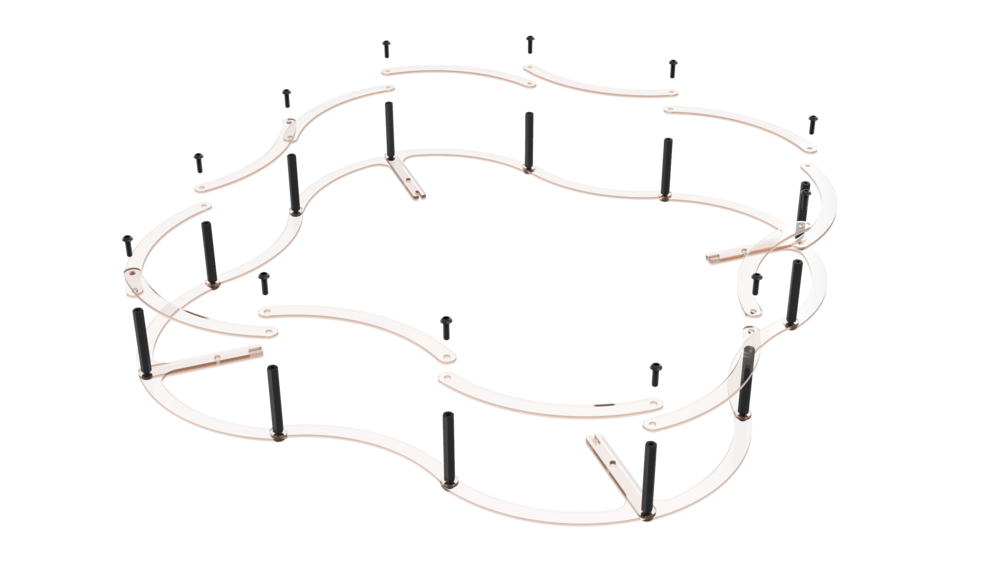
 2. Assemble the top part using twelve M3x10 screws.
 3. Attach the assembly to the drone using four M3x10 screws and steel nuts.
## Mounting the top deck
1. Attach the battery holder to the top deck with four M3x8 screws and steel nuts.
2. Thread the battery strap through the slots in the deck.
3. Attach the top deck using four M3x10 screws.
3. Attach the assembly to the drone using four M3x10 screws and steel nuts.
## Mounting the top deck
1. Attach the battery holder to the top deck with four M3x8 screws and steel nuts.
2. Thread the battery strap through the slots in the deck.
3. Attach the top deck using four M3x10 screws.
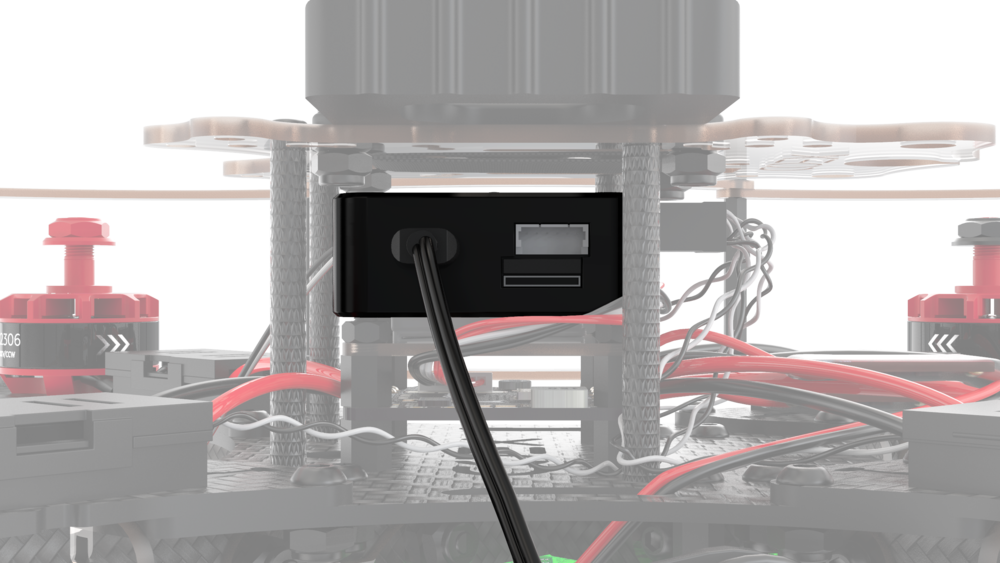
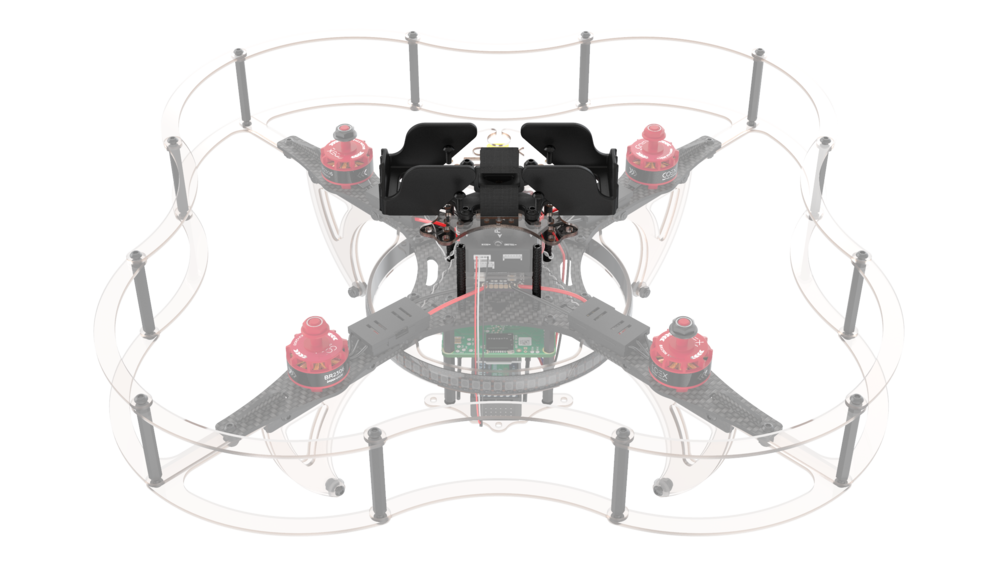 4. Connect the flight controller to the Raspberry Pi using retractable USB cable.
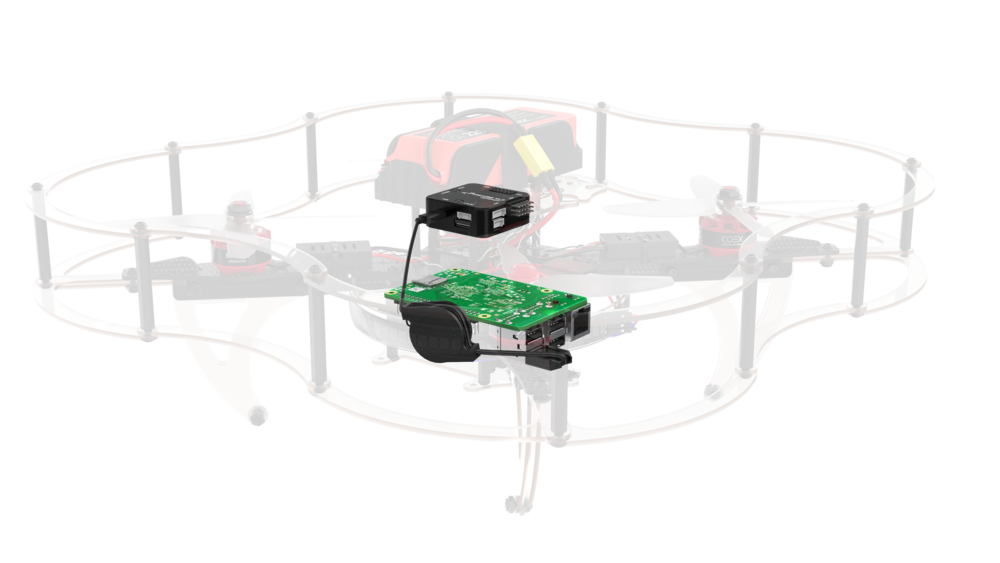
5. Attach the USB cable reel where convenient using 3M double-sided adhesive pads while making sure the cable does not interfere with the propellers.
4. Connect the flight controller to the Raspberry Pi using retractable USB cable.
5. Attach the USB cable reel where convenient using 3M double-sided adhesive pads while making sure the cable does not interfere with the propellers.
 ## Mounting the propellers and preparing for flight
Perform the quadrotor components setup according to [the "Configuration" section](setup.md).
> **Warning** Be sure to **not** mount the propellers **until the setup is complete**. Do it only when you are ready to fly.
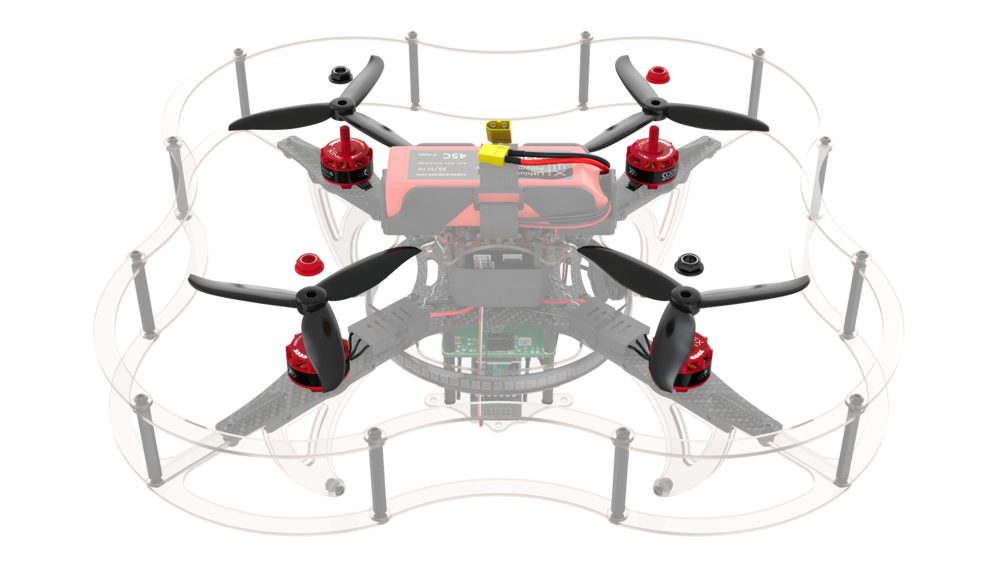
Attach the propellers according to their rotation direction. The battery should be disconnected during propeller installation.
## Installing the battery
> **Warning** Make sure all cables are secured and nothing interferes with the propellers!
Check the quadrotor assembly:
* The balance connector should be fixed under the battery strap.
* The ESCs should be zip tied to the frame.
* All wires from the PDB and flight controller should be tucked under a velcro strap wound around aluminum spacers.
## Mounting the propellers and preparing for flight
Perform the quadrotor components setup according to [the "Configuration" section](setup.md).
> **Warning** Be sure to **not** mount the propellers **until the setup is complete**. Do it only when you are ready to fly.
Attach the propellers according to their rotation direction. The battery should be disconnected during propeller installation.
## Installing the battery
> **Warning** Make sure all cables are secured and nothing interferes with the propellers!
Check the quadrotor assembly:
* The balance connector should be fixed under the battery strap.
* The ESCs should be zip tied to the frame.
* All wires from the PDB and flight controller should be tucked under a velcro strap wound around aluminum spacers.
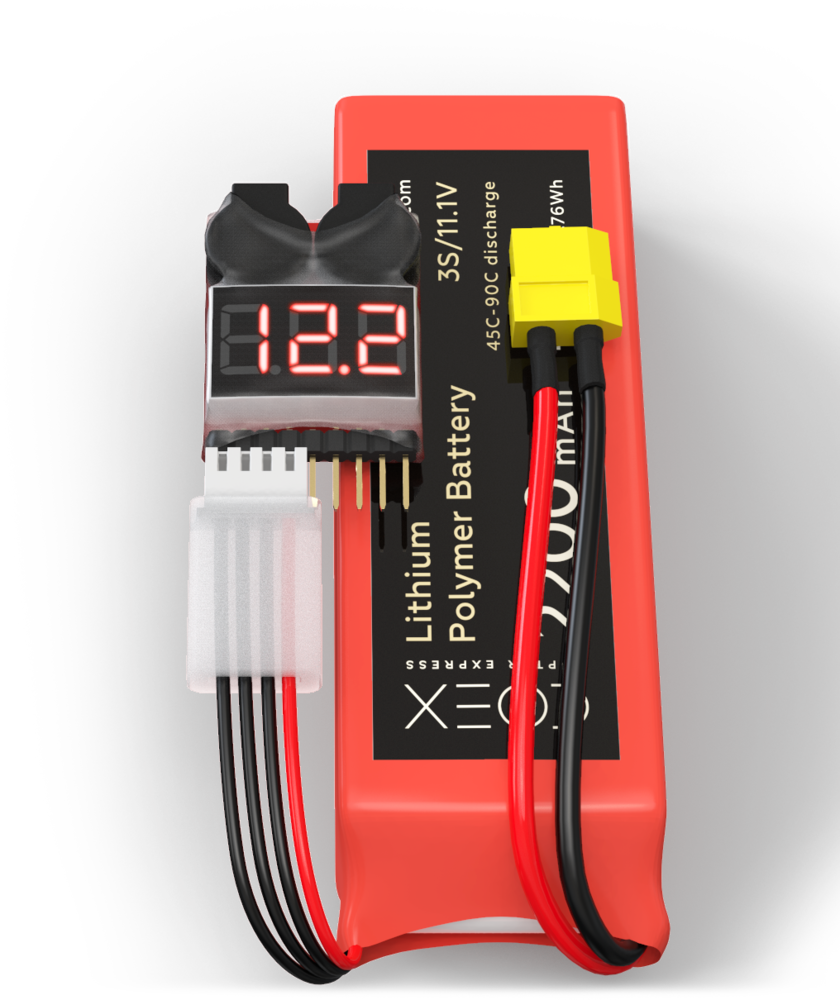
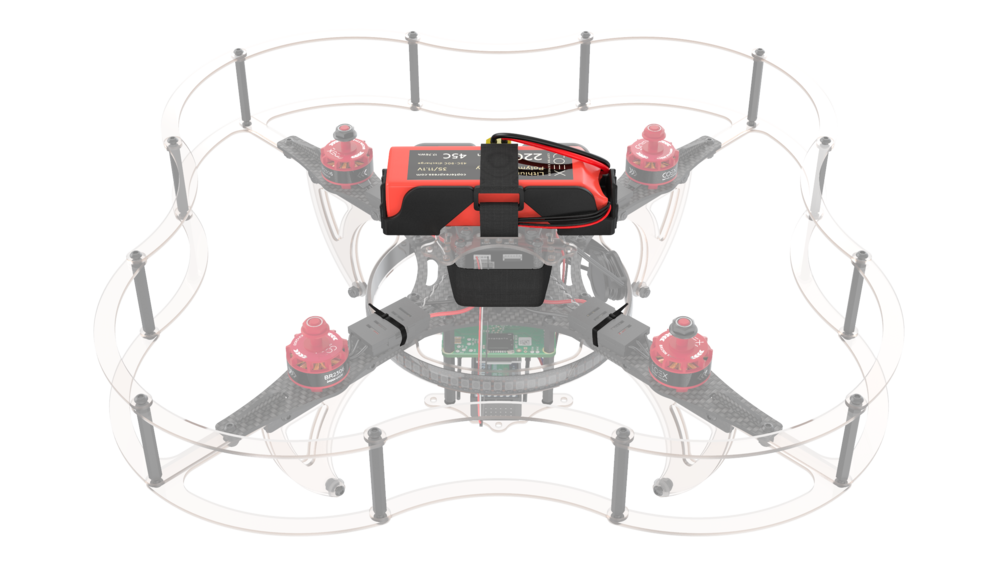 Be sure to install and setup the voltage indicator before flying, so as not to overdischarge the battery. To configure the indicator, use the button located at its base. The displayed numbers during setup indicate the minimum possible voltage in each [cell](glossary.md#battery-cell) of the battery, the recommended value is **3.5**.
> **Info** Sound indication means that your battery is low and needs to be charged.
Be sure to install and setup the voltage indicator before flying, so as not to overdischarge the battery. To configure the indicator, use the button located at its base. The displayed numbers during setup indicate the minimum possible voltage in each [cell](glossary.md#battery-cell) of the battery, the recommended value is **3.5**.
> **Info** Sound indication means that your battery is low and needs to be charged.
 > **Success** The drone is ready to fly!